Good morning and happy Sunday! Hope your weekend is going well. 🙂
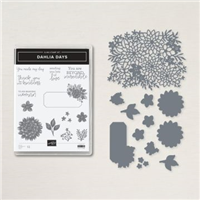
I don’t know about you, but…the Hand-Penned DSP (which is retiring soon!) is one that I am really going to miss! It is so gorgeous – looks like I wish my garden looked! 😉 I paired it with the lovely Dahlia Days stamp set and its bundled Detailed Dahlia dies from the Jan – Jun 2022 Mini Catalog. And – cuz I really like fun folds, that’s what this one is! Take a look-see:

I saw this fold on a video from Susan Levasseur but hers resulted in a 5″ x 7″ card, so…I did some engineer stuff and modified it to end up as a 4 1/4″ x 5 1/2″ card and fit in a normal A2 (medium) envelope.
If you were able to watch me make this one last night on my YouTube channel, I appreciate that – but if you missed it, check out the replay right here!
The layout for the front of this one is from the CAS(E) The Designer challenge over at the Global Design Project.

And I played along with the Just Add Ink Pick-Two challenge. I sort of feel like I hit all THREE! 😉

I started with a 5 1/2″ x 8 1/2″ piece of Blushing Bride cardstock that I scored along the long side at 2 1/8″, 4 1/4″ and 6 3/8″ using my Simply Scored Scoring Tool. Using my Paper Trimmer and putting the short side at the top, I cut the cardstock at 1 1/2″ from the first score line to the third score line. Then I turned it and did the same again – 1 1/2″ from the OTHER edge.

If you’ll check the video – near the start – you’ll see how to fold it. 🙂 Here’s a top down view so you can see how it should look.

I matted a few designs of the Hand-Penned DSP on Basic Black and then into their “spots” on the card base using Liquid Glue. The big and bold floral got the most “play” time – on the two long panels.

I used a “quieter” pattern in Highland Heather on the inside panels.
On a piece of Basic White, I stamped a sentiment from the Dahlia Days set in Misty Moonlight. Then I added the small trio of flowers from the set in Highland Heather and matted it on Basic Black, then adhered it to the “inside”.

For the front of the card, I cut a Basic White panel with the next-to-largest rectangle die from the Scalloped Contours die set. I used the leaf image from Dahlia Days to stamp all over the panel in Mint Macaron. Then I used Liquid Glue to adhere the panel to the front of the card. Hint: Close the card base and center the panel top-to-bottom and side-to-side being careful where you place the glue – you won’t need a lot and you want to be sure you don’t put it where it’s not supposed to be.

Using Stampin’ Seal, I adhered a loose “Z” of the Misty Moonlight ribbon from the 1/8″ Cotton Ribbon pack.
On a piece of Basic White, I stamped the sweet flower from Dahlia Days in Misty Moonlight and again in Highland Heather, then cut them with the matching die from the bundled Detailed Dahlias set. Using Stampin’ Dimensionals – I adhered the two flowers over the ribbon.

Using my Stamparatus, I stamped the pretty Dahlia Days label image in Smoky Slate on a piece of Basic White. I added the sentiment in Misty Moonlight. Then I cut it out with its Detailed Dahlias die. I colored the image with the Light Highland Heather, Mint Macaron and Daffodil Delight Stampin’ Blend.
Using more Dimensionals, I added the sentiment label to the card front. Tip: do this with the card closed, and be sure that the label doesn’t extend past the edge of the card base.
I stamped some leaves/berries in Mint Macaron, cut them with their dies, and tucked them into the grouping with Liquid Glue.

I added some Mint Macaron Genial Gems to the sentiment on the front – and on the inside – and the card was done!
My Basic White Medium Envelope got more of the little Dahlia Days flowers in Highland Heather on the front…

…and more of the Hand-Penned DSP on the envelope flap.

Et Voila! Okay – I LOVE how this card turned out! SOOO much space to show off the uber-gorgeous Hand-Penned DSP (oh – and it’s easy-peasy, too. BONUS!). And the Dahlia Days stamp set is wonderful – it stamps BEAUTIFULLY – look at the detail in that flower – and the pretty label – that you can cut with a Detailed Dahlias die?? Fuhgeddaboudit!! And – like the Stitched Rectangles die set, you NEED to have the Scalloped Contours dies in your toolbox. Just trust me on this! 😉

I hope you like!
If you’d like to recreate this card, all the products and card cuts you’ll need are down below!
And…I’ve also created a printable PDF with written instructions and a list of the products used to create this project. You can download, print and/or save it by clicking this image:

Missed any tutorials? You can check out my past projects right here!
TTFN
M

Connect with me! https://campsite.bio/stampsnlingers
HOST CODE FOR 1 APR – 15 APR: EHXUWRYF
Use this host code when you order $50 or greater and receive a free gift (AND the Monthly Card Tutorial) from me! If your order is over $150, please do not use this code, but you’ll still get the free gift. The free gift is your choice of any item valued up to $10.00 in any active Catalog! That includes some of the Host Exclusive stamp sets! See my Customer Rewards page for full details.
Note: Make sure that you can see my name on the final checkout page listed as your Demonstrator when you order so that you know that you’re ordering with me and you’ll get my rewards!
You’ll also be getting a link to my ZOOM The Craftroom (an exclusive TWICE-A-WEEK online event for my customers) and the monthly Online Tutorial. The April Tutorial features the Flowering Tulips Bundle!


It’s hard to believe, but…the new 2022-2023 Stampin’ Up! Annual Catalog will be here soon! Like…end of this week!! Whoo-hoo!
Here’s the deets:
- The 2022-2023 Annual Catalogs for my customers are ORDERED! Whoo-hoo! Soon as I get them back, I’ll be packing ’em up and sending them right back out to my customers quick as a bunny. I’m figuring they’ll begin arriving in your mailbox by mid-April. Fingers crossed!
- If you’re NOT a current customer of mine but would LIKE to be and would like to get a copy of the upcoming catalog when I mail them out, simply place an order through my online store and you’ll be added to my mailing list!
- Ordering from the new Annual Catalog starts on 3 May 2022!
Let me know if you have any questions. You’ve still got time to get on my list – but…tarry not!
I’ve got my pre-order on the way, too – maybe keep an eye out for a pop-up unveiling video on Monday or Tuesday! And – if you’re interested in joining the team, then you can preorder and get the discount for yourself! You can even add the items on the Pre-Order list to your Starter Kit – pick $125 worth of product and pay just $99 plus tax – and you’ll even get FREE SHIPPING! Head over to my joining page here to see the benefits of being a Demonstrator and to sign up now! I would love to have you on my team and help you get all the discounts, and early goodies, and…ALL THE THINGS! 🙂
The 2021-2022 Annual Catalog Last Chance Products Sale

You’ve been waiting and now is the Time! The Last Chance Products are available for you to order!!
Stock up on your favorite products before they’re gone for good! Save up to 50% on essential craft supplies. Please note – this selection of Last Chance Products is only available while supplies last!!
DEETS:
- Each Last Chance Products promotion typically includes a Retiring List (products that will no longer be available once the catalog retires) and a Carryover List (products that will still be available once the catalog retires). For this catalog’s Last Chance Products promotion, a Carryover List will not be provided; carryover products can be viewed in the 2022–2023 Annual Catalog.
- All products are available while supplies last, and there are no purchase limits.
- Discounted items can be added to a Starter Kit and redeemed as a 50% off item or with Stampin’ Rewards. Whoo-hoo!
- Only orders opened and closed during the promotion period apply.
- Stamp Sets are not guaranteed during this promotion and are while supplies last.
ORDER DEADLINE
- 2 May 2022 at 11:50 PM (MT) – but remember that these things are while supplies last – when they’re gone they’re gone!
Click here to go right to the Last Chance Products in my Online Store!
Get the Stampin’ Up! Products Used in this Project:


Card Cuts Used in This Project:
Blushing Bride Cardstock: 5 1/2″ x 8 1/2″ (card base, scored, cut and folded as shown in the template and video)
Basic Black Cardstock: 1 7/8″ x 5 1/4″ (x2 – mats for long floral DSP panels); 1 7/8″ x 2 1/4″ (x2 – mats for front Highland Heather DSP panel and for inside sentiment panel); 1 1/4″ x 1 7/8″ (x4 – mats for inside Highland Heather DSP panels on inside)
Basic White Cardstock: Next-to-largest Scalloped Contours rectangle die cut (front panel); Detailed Dahlias die cut label (sentiment); Detailed Dalies die cut stamped flowers and leaves; 1 3/4″ x 2 1/8″ (inside sentiment)
Hand-Penned DSP: 1 3/4″ x 5 1/8″ (x2 – long floral DSP panels); 1 3/4″ x 2 1/8″ (front Highland Heather DSP panel); 1 1/8″ x 1 3/4″ (x4 – inside Highland Heather DSP panels); 3″ x 6″ (envelope flap)
If you need any stamping supplies, I’d be very happy to be your Demonstrator. Just click on the Order Stampin’ Up! Online Now button on the right side of the screen to go directly to my online store or drop me an email if you have any questions. Happy Stamping!
Shop the Clearance Rack here. Earn FREE Stampin’ Up! Products – Join my Punkin Head Peppermint Rewards – My online customer thank you program!
Finn Fan Fix

We really like tamales at our house.
And it’s a pretty frequent focal point at dinner – Wayne would eat tex-mex 3 or 4 times a week (which is actually a pretty handy thing, not gonna lie. Stuck for dinner? Beef and bean burrito – done!).
We discovered some really excellent tamales at Costco and I keep them in the freezer – so I can pull one out – microwave it a bit and boom-shaka-laka. Dinner. Done!
Yes – I AM a gor-met cook. 😉
Now one might be inclined to think that the fur-man would turn up his schnoozle at a plate that had had tex-mex/tamale on it.
He turns up his nose at a bowl that’s had oatmeal in it – no joke!
But….

…nope. It’s plate-holding-good stuff, Mom!
I dunno. He’s a bit of a goof. 🤷♀️🤷♀️🤷♀️
TTFN


 #20 Demonstrator in Sales in the US 2023-2024
 #13 Demonstrator in Leadership in the US 2023-2024
 #21 Demonstrator in Team Building in the US 2023-2024


 KarensCardCorner
 Stamp with Amy K
 Stampin With Shirley G
 Tarabeth Stamps
 TL's Bright Spot
Such a cool card! Love the layering and the fancy fold design! Yeah, oatmeal must be too bland for such a sophisticated palate. 😉
Yep – he’s pretty serfisticated all right! 😉 Thanks, Amy! 🙂
I will have to give this fun fold a go. The paper and the dahlia really make it shine. If my local Costco has those tamales, I’m gonna get me a membership! I LOVE tamales and even ate them for breakfast in Cancun! I can’t find any around here. There was a guy along side the road but the police made him skedaddle! I’m leary about buying like that anyway. Have a blessed day and take care of them maters!
Yes, ma’am – if they have them, they’re really good! Fingers crossed! Thank you so much, Karen! 🙂
Very pretty papers and a wonderful fancy fold. Chantell Just Add Ink
Thank you so much, Chantell – appreciate you stopping by!!
Love a good fancy fold card and especially one as pretty as this. Lovely colouring and design. Thanks for providing the temaplte – I think I’ll give this one a go. Thanks for joining us at Just Add Ink. Tristan DT.
Thanks muc, Tristan – appreciate you stopping by! Have fun with it – it’s a cool fold!