Good Friday, to you all! Today, I have a cautionary tale to share with you. It’s a story about a girl. Okay – a semi-old woman. A story about a semi-old woman, with an age-old problem. I call it….The Day Mary Had Get-The-Card-Done-itis!
A little background info is in order. In the world of aviation, those who fly airplanes (AKA pilots), if they do so long enough, will – one day or another – encounter a situation that is 1) beyond their limits as pilots to deal with, 2) exceeds the capabilities of their aircraft or 3) is just too dangerous to go thru/over/around. Now most of the time (I’d even say 99.9% of the time!), the prudent pilot will return from whence they came or land immediately. Choosing to become one of the “old pilots” (perhaps you’ve heard the saying….there are old pilots and there are bold pilots, but there are no old bold pilots?).
But sometimes, and it happens to all of us….we make a bad decision. The kid’s birthday party is tonight. It’s my anniversary and the wife/husband is going to be sooooo mad if I don’t get there. We’re leaving on vacation tomorrow and I have to pack the car. We decide that we “must” get home, no matter what.
Get-Home-Itis.
If we’re lucky – or the Big Guy is flying right seat – we make it thru in spite of ourselves. If not…well….you know.
Now – what I experienced today had zero, zilch, nada by way of potentially fatal outcomes. Which is good. Cuz I was seriously afflicted with the “-itis”. The Must-Get-the-Card-Done-itis “-itis”. Pile on to that the fact that I’m tired and…well.
And, just to be completely clear – I didn’t need this card to be done today. I already have two cards ready to go in the line-up, so today (Friday) was covered. Just sayin’.
So in this post, I’m going to share some tips, and some “off-ramps” – so perhaps you’ll recognize when you’ve been afflicted with the “-itis” and will turn back and land.
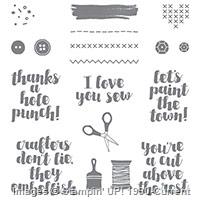
I’d had an idea in my head for a bit about a card using the fun paintbrush stamp in the Love You Sew Hostess Set from the Annual Catalog. So when I saw the CAS(E) This Sketch #158, I knew that it was time to implement my plan!

I woke up a little later than my norm – the late nights are starting to tell on me! Talked with Wayne on the phone for a bit, watched a little tv to get fully awake. Thought I’d leave a little early and make a quick run to Target for some groceries and stuff. You know – domestic Goddess stuff! Then I thought – hey, I’ve got an hour, I’ll just knock out a card. 🙂 Here’s where the ensuing twisty road got me. Take a look-see:

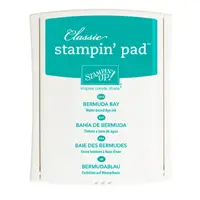
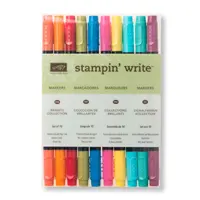
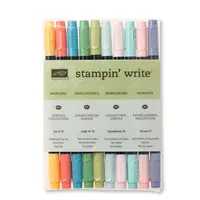
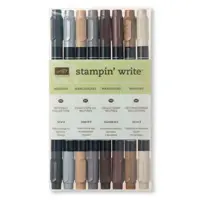
See? The sketch was perfect! The other day I’d had another sketch in my head, so I’d pulled out the Have a Cuppa DSP and determined a color scheme, so I was half way there. I started by SNAILing a panel of said DSP to a Bermuda Bay mat. For the center section, I used a piece of Shimmery White card stock. I used my Stampin’ Write Markers to ink the Love You Sew paintbrush – Basic Gray for the handle, and then Bermuda Bay, Melon Mambo and Pool Party for the bristles. And the paint swaths.

I inked the paint brush and stamped the Bermuda Bay image onto my panel. Then I decided it would be good to go ahead and pull out the Stamp-A-Ma-Jig to get the other two brushes exactly where I wanted them.
Hint 1: If you don’t have a Stamp-A-Ma-Jig, get one immediately!! It’s like the best darned $12 tool there is!
If you do have a Stamp-A-Ma-Jig….use it – it doesn’t help you at all sitting off all by itself!
So, using the Stamp-A-Ma-Jig, I inked and stamped the other two brushes.
I’d already cut an oval from Melon Mambo with the smallest of the Ovals Collection Framelits, so I did a little dry fitting to be sure I was still good. Then, again with the Stampin’ Write Markers, I quickly made my first paint swath.
And ran it all the way to the bottom of the panel. Hmmm. Not what the sketch calls for, but…okay.
Made my other two swaths. All to the end of the panel. All the same length. Fail. Decided I could live with it, cuz the clock was ticking around the hour I’d allowed myself. So I SNAILd up the back of the panel and….
Decided I couldn’t live with it. Started over. Now starting to hurry.
Hint 2: this is the first place I should have called it quits. I did not. I hurried. When you start to hurry, you start to make mistakes, which means you have to re-do steps.
A Lot.
Started over. Used Stamp-A-Ma-Jig. Got too quick with the stamp-on-the-block cleaning it in my Stampin’ Scrub. Stamp departs block – have to start over lining up the Stamp-A-Ma-Jig.
Now – it’s important to note that every brush stamp requires: 1) inking the handle with Basic Gray, 2) inking the bristles with the “Paint” color, 3) stamping the image, 4) cleaning the stamp in the Stampin’ Scrub and 5) repeating with the new “paint”color. So – easy, but not terribly quick.
Tic-tock-tic-tock……
Finally get all three paintbrushes stamped. Make swaths that are the right lengths. Whew!
At that point, I went ahead and SNAILd the panel to it’s double mat of Melon Mambo and Bermuda Bay.
For the sentiment, I used my Melon Mambo Stampin’ Write Marker and individually inked and stamped the words “Love” and “You” on a piece of Shimmery White card stock. Definitely used the Stamp-A-Ma-Jig on this part!

I punched it out with the Scalloped Oval Punch, and rolled the edges on my Bermuda Bay ink pad. Got the “layer” I needed to match the other card stock layering, without the extra bulk! Then I SNAILd it to the Melon Mambo oval I’d cut out earlier.
At this point, it’s ten minutes to noon. Hmmm.
Decided that I’d skip the store – After all, I have plenty of frozen meals….who needs body lotion in the desert!!? There’s always tomorrow.
Should have quit. Didn’t.
I SNAILd the art panel to the card front and popped the sentiment oval on with Stampin’ Dimensionals.
For the inside, I just used another panel of Shimmery White, SNAILd onto a panel of Bermuda Bay. I inked up the Love You Sew sentiment in Melon Mambo and stamped it in the center. Then used the Stamp-A-Ma-Jig, once again, to line up a Basic Gray and Bermuda Bay paint brush.

Now 12:02.
I SNAILd the inner liner into my Melon Mambo card base and did the same with the card front.
What an awesome time to stop and get ready to go. All I lacked was the envelope, and that’s quick. Could easily do it tomorrow.
Nope.
I pulled out a Whisper White Medium Envelope and lined up two paintbrushes on the front – with the Stamp-A-Ma-Jig. Remember the steps to do the brush images! Tic.
Tock.

I pulled out another piece of the Have a Cuppa DSP to match my card front, and cut a liner with my Envelope Liner Framelits. I slide it into the envelope and SNAIL the flap down. To crease the liner, I always use the score tool on my Stampin’ Trimmer, so I placed the envelope in the trimmer, grabbed the dark gray tool and quickly (time is definitely running out now!) slide it across my envelope.
If you’re an experienced Stampin’ Trimmer user – this is like a train wreck, isn’t it? You can see the train coming, and you can’t bear to watch! But you can’t look away, either. You know what’s coming!
Yes. The dark gray tool is the….cutting tool. NOT the scoring tool. That’s the light one at the top!
Envelope and liner – done. Useless. Flap half cut off. Into the round receptacle it goes. I reach for another piece of the Have a Cuppa DSP.
None.
I suppose you think I quit now, right?
No, I really didn’t. I was in it to win it. Now I’m bargaining – well, I’m always a little early to work. What’s the worst that will happen if I’m a little late? I’m kind of a big deal….Nothing will happen – might have to bring donuts. Okay. There’s time.
KEEP GOING!
I found another design in the DSP stack that had the hearts – so I started coloring them with the Stampin’ Write Markers.
Tic-Tock….
Re-cut the liner. Very very deliberately score the line!
Hint 3: Always always double (maybe even triple!) check that you’re pulling the tool you want. That little cutter will cut the heck outta whatever it hits – whether you wanted it to or not!!

Et Voila! Finally! My card vision came true and I ended up with a card I really like! Hope that you do, too – and that you’ll take heed.
Hint 4: It really does take longer to hurry a card than it does to quit while you’re ahead! 😉
Be sure to check out the Stamp-A-Ma-Jig and add it to your stash! It’ll be the best $12 you ever spend on craft tools.
And – if you love this Love You Sew stamp set, remember the only way to get it is as a Workshop Host. Holler at me and I’ll get you hooked up!
The Clear Wink of Stella ordering special is ongoing until 15 Feb! Be sure to get yours, okay?
TTFN
Mary
P.S. I know you were worried – so, yes…I did make it to work in plenty of time! 🙂
Stamps-N-Lingers Ordering Special
Clear Wink of Stella Glitter Brush
You know I’m a huge fan of the new Wink of Stella Glitter Brushes! And, since I love them so much…I’m giving them away! From now until the 15th of February, when you order $50 or more in product, I’m going to throw in a Clear Wink Of Stella Glitter Brush for free!
FREE

If you’ve used this fun tool – you need no persuading about its awesomeness. If you haven’t – here’s a great chance to try it for free – while you’re getting the Stampin’ Up! goodies that you love! Don’t forget, you’ll also get your ordering gift from me and two Peppermint rewards points and a Sale-a-Bration Item. Cool beans, huh!?
HOST CODE FOR 1 Feb – 15 Feb 16: DH9S6776
Use this host code when you order and receive a free gift from me! But, if your order is over $150, please don’t use this code (you’ll miss out on your own Stampin’ Rewards if you use it) but you’ll still get the free gift. The free gift for Feb is your choice of any item valued up to $8.00 in the brand new 2015-16 Annual Catalog or the 2015 Occasions Catalog.
WEEKLY DEALS FOR 2 Feb – 8 Feb 16!! Click here to see the Weekly Deals from Stampin’ Up! in my online store. The Weekly Deals are only while supplies last and only available at these great prices through 8 Feb!


Built for Free Using: My Stampin Blog
STAMPIN’ UP! PRODUCTS USED IN TODAY’S CARD:


Built for Free Using: My Stampin Blog
CARD CUTS USED IN TODAY’S PROJECT
Melon Mambo Card Stock: 4 1/4″ x 11″ (card base, scored and folded at 5 1/2″); 3 1/8″ x 4 3/8″ (mat for focal piece); small Oval die cut
Bermuda Bay Card Stock: 4 1/8″ x 5 3/8″ (card front mat and inner liner mat); 3″ x 4 1/4″ (mat for focal piece)
If you need any stamping supplies, I’d be very happy to be your Demonstrator. Just click on the Order Stampin’ Up! Online Now button on the right side of the screen to go directly to my online store or drop me an email if you have any questions. Happy Stamping!
Shop the Clearance Rack here. Earn FREE Stampin’ Up! Products – Join my Punkin Head Peppermint Rewards – My online customer thank you program!
BACKORDER REPORTING
Stampin’ Up! has started a new way to let you all know when items are Backordered or in Limited Supply. When you place an order thru my Online Store, you’ll get a message telling you a status of the item.

If you want more information on a particular product – like when it’s expected back in stock – please give me a call or shoot me an e-mail and I’ll be glad to help! 🙂


 #20 Demonstrator in Sales in the US 2023-2024
 #13 Demonstrator in Leadership in the US 2023-2024
 #21 Demonstrator in Team Building in the US 2023-2024


 KarensCardCorner
 Stamp with Amy K
 Stampin With Shirley G
 Tarabeth Stamps
 TL's Bright Spot
Love your card! It may have taken a couple of tries…but it turned out perfectly! 🙂 And it’s a story that I can relate to on so many levels. 😉
Thanks, Amy! 🙂
I’d say you are a bold pilot. Great story worthy of a novel. And a fine card to boot.
Oh, I’m pretty sure I was never a bold pilot, Mom – but appreciate the vote of confidence! Thanks! 🙂
Oh, this is so fun! I love the paint brushes — fabulous take on the sketch!
Thanks so much, Leigh! 🙂