
Good Blog-Hop-Thursday-Morning to y’all! I hope you’re ready for some beautiful projects from all the Ladies-Who-Hop. At the end of the post are links to all the blogs – be sure to cruise thru all of them, okay?
I did want to share a quick thing that happened today. By “today” I mean Wednesday, when I’m writing this post. Which I’m writing for tomorrow. Which is technically today. See the difference? Hint – one has quotes….. 🙂
Anyway – there were multiple sightings of an unidentified object in the skies over Atlanta. The news mentioned it a few times – at least the local news did. Not sure about National. Many people saw it. Actually, my horses saw it, too. And they were scared. Scared enough to break a sweat! That’s bad.
This was a glowing ball – and it moved quite slowly. It had a trajectory that was obviously controlled – not at all random. If you stared at it – it’s image remained in your eyeballs for a while after you looked away. And it was….warm-ish. I mean, you could sort of feel heat radiating from it!
Really quite odd.
We may never know what it was. But, it was weirdly comforting – no threat at all. I hope it will be back tomorrow. 🙂
So – today’s Blog Hop is a sketch challenge. Here’s what we were working to:

When I first started thinking about what to do for this sketch, I had something completely different in my head. There was a lot of sponging involved. I didn’t do that – not even close. I used some Wonderland images and some of my favorite Home for Christmas DSP designs, and the Sleigh Ride Thinlits. Take a look-see:

Now, I’ll tell you straight – I made some construction errors making this card. So I’m going to tell you how to do it right, okay?
I’m not sure if you can see how much depth is in my “window”, but I wanted to get as much as possible. Which meant I needed to have my musical card front popped up. I also figured I’d make the window frame pop up above that, adding even more depth. In order to pop the musical Home for Christmas DSP, I needed it to have a little weight to it – so I SNAILd that panel to a piece of Very Vanilla card stock. Both panels identically sized.
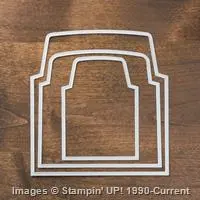
Then, I used one of my Square Framelits to cut a hole in the layered panel. Here’s where I screwed up. What I did was to cut the hole the same size as the outside of my frame. What I should have done was cut it the same size as the inside of my frame. Duh! So, if you CASE this, don’t be like me. Be smarter!

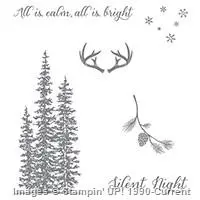
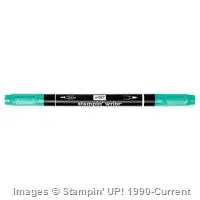
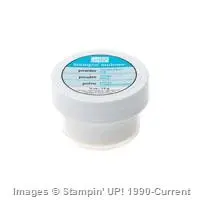
I popped that card front onto a panel of Pool Party card stock, which was my mat. Then I built my window image. I used Versamark and White Stampin’ Emboss Powder to heat emboss a few of the Wonderland tree images onto a Window Sheet. Then I heat embossed a couple of the Wonderland snow flake images above the trees, using more Versamark and Iridescent Ice Stampin’ Emboss Powder. You probably can’t see them…sorry!…but I also colored the snowflakes a little with my Pool Party marker.
Then, I cut two window frames, one from Pool Party and one from Very Vanilla. I did that by running the card stock thru the Big Shot with two Square Framelits (that are adjacent to each other in size) at the same time. Hint: Get them aligned on your platform/cardstock, and then use a couple of Sticky Notes to hold the framelits down and ensure they don’t move while you’re cutting!
I glued the Pool Party frame to the heat embossed window sheet using Multi-Purpose Liquid Glue. Then I turned it over and glued the Very Vanilla frame to the window sheet, directly over the Pool Party frame. This sandwiched the window sheet between the two frames. I trimmed the excess window sheet with my Paper Snips.

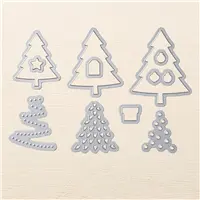
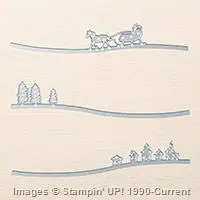
The little wintery scene is 3 – layers. The bottom layer is a piece of the Home for Christmas DSP that looks – to me – like a snow flurry filled sky. The next layer is a piece of Dazzling Diamonds Glimmer Paper – I cut out the Sleigh Ride Edgelits houses image – and then lightly colored just the houses with my Pool Party Stampin’ Write Marker. Finally, I cut a piece of Pool Party Card Stock, and ran if thru the Big Shot with the Sleigh Ride die from the set. I adhered them together with SNAIL and Liquid Glue. Then I used SNAIL and adhered the scene to the Pool Party card front mat – inside the hole I’d cut in the DSP layers. Did that make sense?
Finally, I used some Stampin’ Dimensional and adhered the decorated window over the top of the snow sleigh ride scene!
The second square element is a piece of Very Vanilla, stamped several time with the Wonderland trees in Pool Party. I stamped some after stamping off on scrap paper, and some without doing that. Then I stamped the sentiment in Tuxedo Black Memento Ink. Finally, I heat embossed some more of the snowflake images in Iridescent Ice Stampin’ Emboss Powder. Then I SNAILd it to a Pool Party Mat.
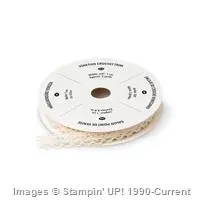
I ran a piece of the Venetian Crochet Trim around the card front, adhering it in the back with some scotch tape. I did the same on the sentiment square, being sure to align it with the trim on the card front – I wanted it to look like one continuous piece. I used Stampin’ Dimensionals on the back of the sentiment square – except where it would lay over the raised up window, where I used SNAIL – and popped it onto the card.
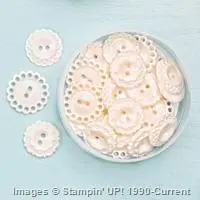
Then I tied a tiny little bow from the Venetian Crochet Trim and used a Glue Dot to stick the bow onto a small Very Vintage Designer Button. I adhered it to the card with a couple more Glue Dots. Wish you could have seen me debating and hemming and hawing on where to place that – side? Center? Oh my – it was awful! 😉
I set the card front aside and worked on the inner liner.

I stamped some more of the Pool Party Wonderland tree images across the bottom of a piece of Very Vanilla and then SNAILd it to some more of the Home for Christmas snow flurry image DSP. I added the sentiment in Tuxedo Black, and that was that!

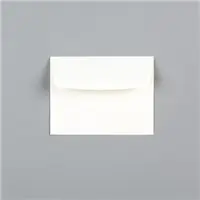
I finished off the card by SNAILing the card front onto my Very Vanilla card base and then adding the inner liner. All that remained was an envelope!
I stamped some Wonderland trees – again in Pool Party – to a Very Vanilla Medium Envelope….

….then I used my Envelope Liner Framelits to add a Home for Christmas DSP liner.

Et Voila! Not at all what I’d first envisioned this card would be – what with there being no sponging whatsoever! – but I think it turned out pretty. I love how the the embossed trees on the window are in the forefront of the snowy scene! There’s really a lot of depth in the card. 🙂
Now – be sure to go to all the ladies’ blogs and check out their creations! If you click on the Next Blog button, you’ll go right to Jari Francis’ page. And you can just click on the names below to go direct to all the blogs!

Mary Deatherage – YOU ARE HERE!
Enjoy the Hop – and I’ll see you tomorrow!
TTFN
Mary
P.S. Lest you be thinking that the unidentified object in the sky is the precursor to our very own Independence Day….or War of the Worlds or something…..it was the SUN! We haven’t seen it for so long, it was a little disconcerting to see it in all its glory today! 🙂
WEEKLY DEALS FOR 10 Nov – 16 Nov 15!! Click here to see the Weekly Deals from Stampin’ Up! in my online store. The Weekly Deals are only while supplies last and only available at these great prices through 16 Nov!
Built for Free Using: My Stampin Blog
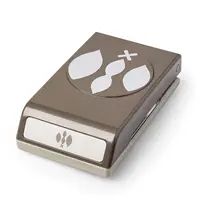
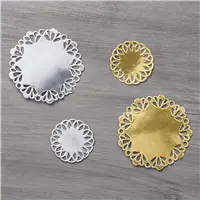
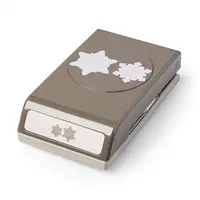
STAMPIN’ UP PRODUCTS USED IN TODAY’S PROJECT:


Built for Free Using: My Stampin Blog
Card Cuts Used in Today’s Project
Very Vanilla Card Stock: 5 1/2″ x 8 1/2″ (card base, Score and fold at 4 1/4″); 4″ x 5 1/4″ (panel under Home for Christmas music DSP); 2 1/4″ square (sentiment); inner window frame (3″ outside square, 2 1/2″ square cut from inside); 4″ x 5 1/4″ (inner liner)
Pool Party Card Stock: 4 1/8″ x 5 3/8″ (front mat); 2 1/2″ square (sentiment mat); outer window frame (3″ outside square, 2 1/2″ square cut from inside); ~2″ x 3″ (sleigh ride image)
Home for Christmas DSP: 4″ x 5 1/4″ (card front – music); 3″ x 3″ (bottom of snow scene); envelope liner
Dazzling Diamonds Glimmer Paper: ~3″ x 3″ (Houses image)
Window Sheet: 3″ x 3″
If you need any stamping supplies, I’d be very happy to be your Demonstrator. Just click on the Order Stampin’ Up! Online Now button on the right side of the screen to go directly to my online store or drop me an email if you have any questions. Happy Stamping!
Shop the Clearance Rack here. Earn FREE Stampin’ Up! Products – Join my Punkin Head Peppermint Rewards – My online customer thank you program!
BACKORDER LIST AS OF 11 NOV 15
11 November
139647: To You and Yours Shaker Cards Project Kit (1,912 backordered; 4,000 expected)
15 November
139672: Softly Falling Textured Impressions Embossing Folder (735 on backorder; 6,480 expected November 15; 3,240 November 30)
139673: Woodland Textured Impressions Embossing Folder (12,218 on backorder; 8,424 expected on November 15; 12,096 expected on December 7)
19 November
139639: Home for Christmas Designer Buttons (1,698 backordered; 2,016 expected)
139643: Reindeer Paper Clips (1,673 backordered; 10,368 expected)
20 November
138281: Lots of Labels Framelits Dies (64 backordered; 720 expected)
138317: Corrugated Paper (559 on backorder; 2,800 expected on November 20; 2,000 expected on December 10)
23 November
138309: Fine-Tip Glue Pen (1,641 on backorder; 2,550 expected on November 23; 10,200 expected on November 25)
138401: Gold Metallic Thread (766 backordered; 2,560 expected)
138402: Silver Metallic Thread (250 backordered; 2,560 expected)
25 November
139638: Snowflake Elements (6,069 backordered; 15,120 expected)
140536: Home for Christmas Enamel Dots (1,227 backordered; 10,440 expected)
1 December
138283: Leaflets Framelits Dies (2,683 on backorder; 5,040 expected on December 1, 2015; 1,296 expected on January 4, 2016)
14 December
139618: Gold Cording Trim (190 backordered; 5,248 expected)


 #20 Demonstrator in Sales in the US 2023-2024
 #13 Demonstrator in Leadership in the US 2023-2024
 #21 Demonstrator in Team Building in the US 2023-2024


 KarensCardCorner
 Stamp with Amy K
 Stampin With Shirley G
 Tarabeth Stamps
 TL's Bright Spot
Absolutely beautiful card, Mary. I love everything about it!
Thanks, Mom! I’m just about out of that Christmas music paper. Thinking about raiding my real music stash!! 🙂
Mary, this is gorgeous! I feel a case coming on!
Thanks so much, Kathy! Go for it and enjoy! 🙂
wow, stunning card Mary, so much detail and depth and I love the color combo you used.
Thanks, Sandi! I’m quite pleased with it! 🙂
I love it! The designer paper that you picked is perfect and the colors are stunning. The crochet trim is fabulous with your design too! I was as excited as you were to see that large glowing object in the sky yesterday…apparently it only for a fleeting second, it’s gone again today… 😉
I’m guessing NASA chased it off…. 🙁 That darn crochet trim is just wonderful – I just bought it the last time it was in the Weekly Deal. It’s gorgeous! Thanks, Amy! 🙂
Oh so beautiful! What a cool scene you have created! Love all of the small parts that create the whole lovely card.
Thanks so much, Jari!! 🙂
Such a beautiful card….love the window and the colors you chose. You went over the top!!
Thank you, Shelagh! 🙂
This is beautiful! Love the top box….very cool!!!! love that color blue too 😀
Thanks so much, Heather! 🙂
Beautiful mary, so elegant, soft and detailed. Gorgeous
Appreciate it, Kristi! Thanks for leaving a comment! 🙂