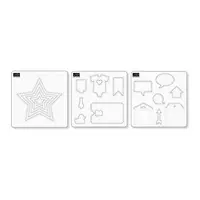
Alrighty then – as part of my promise to provide you with card ideas that only take a minimal amount of “stuff” to make – more specifically, one stamp set! – today I present (pun intended!) just such a card. It uses the almost-available-so-close-you-can-just-taste-it Your Presents stamp set – new for the 2015 Holiday Catalog and available for your ordering pleasure day after tomorrow… And that’s it! Just that set. All you need to add is a little ink, some holiday DSP, a Whisper White Note card and envelope and a little bling!
Take a look-see:

I started with, as I mentioned above, a Whisper White Note Card and Envelope. These are things I just keep around – and if I start to get low, I re-order right away. They’re just too handy to be without!
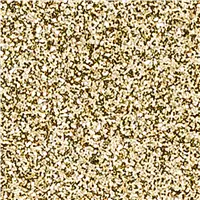
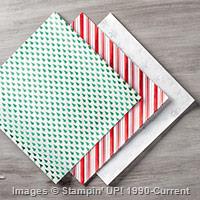
I cut a mat out of the pretty Holiday Catalog Holidays Fancy Foil Vellum, in the red-and-white striped pattern. This paper has three patterns in it – this one, a green Christmas Tree pattern and a silver Snowflake pattern.

I used SNAIL in the foil-covered areas to adhere it to my note card. The foil did a great job of hiding any trace of adhesive. But – beware! If you get adhesive on the FRONT of this paper – the rubber Adhesive Remover doesn’t work so bueno! That’s not to say that I found this out first-hand or anything! 😉
For the card front, I cut a piece of Whisper White card stock. The presents are made using the “kissing” technique. In this technique – you ink up the patterned stamp – so, in this case, I used the striped stamp – and then you stamp your solid stamp onto the inked patterned stamp. What happens is that your solid stamp picks up the ink from the patterned stamp. So I was able to get striped “presents”!

I did two Real Red presents – using the striped pattern stamp and the large and small “ribboned” presents stamps. The green stamp is made with Garden Green ink and, since I don’t have a Garden Green Ink Pad (it’s now on my to-get list), I used my Garden Green Stampin’ Write Marker to ink the striped stamp,
All three ribbons are done in Real Red. As is the sentiment. And these are ALL from the one stamp set – Your Presents!
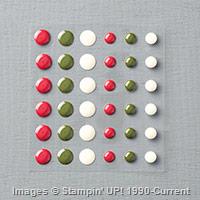
I popped the art piece onto my card front with Stampin’ Dimensionals. Then I added a little bling – I put a Rhinestone Basic Jewel on the “dot” over the “j” in joy. Then I added three enamel dots from the new Home For Christmas Enamel Dots embellishments. Guess when those are available? No – really. Guess! I surely hope you said….1 Sept! 🙂
And that was it for the front of the card. Easy peasy, right?

The inside is just a piece of Whisper White card stock, stamped three times with a Real Red “twine” bow. Now – truth. You probably don’t NEED an additional piece of card stock – the note cards have plenty of heft to stand on their own. You WILL need it, however, if you screwed up your initial effort and decided that you didn’t want to lose the whole card. Just giving you some options here…. 😉

I used my Stamp-A-Ma-Jig to be sure I got the little twine bows where I wanted them. The second time I stamped them…..
I added a few Your Presents presents to the front of the matching Envelope

With Real Red and Garden Green again. Et Voila!
Easy peasy nice and breezy! I don’t think it could be a whole lot quicker or easier. I actually think this would make a great Thank You card for Christmas. What a cute set of cards it would make as a gift all in itself! You’ll see below the list of items that you’ll need – I bet you’ve already got a few of them in your tool box!
I don’t mean to harp folks, but you’re almost out of time to get in on the Holiday Catalog Shares. And this card uses TWO items that you’d get in a full I Want it All Share – the Holidays Fancy Foil Vellum DSP and the Home for Christmas Enamel Dots. See everything you’ll get on the Holiday Catalog Shares page – and hurry to get signed up! Technically, today is the deadline, but…because I like ya and because I’ve made myself a handy spreadsheet that will quickly let me update what I need to order…I’ll extend the sign up to Monday evening at 8PM Eastern! 🙂
Enjoy the rest of your weekend, and I’ll be back in your inbox on Monday! 🙂
TTFN!
Mary
WEEKLY DEALS FOR 25 Aug – 31 Aug 15!! Click here to see the Weekly Deals from Stampin’ Up! in my online store. The Weekly Deals are only while supplies last and only available at these great prices through 31 Aug!
Built for Free Using: My Stampin Blog
2015 Holiday Shares are Open!

Shares are a great way to get a little bit of all the new Designer Papers, Ribbons and Embellishments to use in your holiday masterpieces! Go to the 2015 Holiday Catalog Shares page and see what could be coming your way! I’ll order early on 1 Sept, with expedited shipping, and get everything back out just as quick as I can!

Paper Pumpkin – the fun comes right to your door! Give it a try today!
Offer Dates: July 23-September 10, 2015
Get the details here!
STAMPIN’ UP PRODUCTS USED IN TODAY’S PROJECT:


Built for Free Using:My Stampin Blog
Whisper White Note Card and Envelope
Whisper White Card Stock: 3 1/8″ x 4 5/8″ (front art piece); 3 3/8″ x 4 7/8″ (inner liner – the one you may or may not need!! 😉 )
Holidays Fancy Foil Vellum DSP: 3 3/8″ x 4 7/8″ (front mat)
If you need any stamping supplies, I’d be very happy to be your Demonstrator. Just click on the Order Stampin’ Up! Online Now button on the right side of the screen to go directly to my online store or drop me an email if you have any questions. Happy Stamping!
Shop the Clearance Rack here.
Earn FREE Stampin’ Up! Products – Join my Punkin Head Peppermint Rewards – My online customer thank you program!
BACKORDER LIST AS OF 28 Aug 15
4 September
138288: Brick Wall Textured Impressions Embossing Folder (3,694 backordered; 9,504 expected)
7 September
138401: Gold Metallic Thread (654 backordered; 2,560 expected)
138402: Silver Metallic Thread (602 backordered; 2,240 expected)
11 September
138378: Tin of Cards Project Kit (more details)


 #20 Demonstrator in Sales in the US 2023-2024
 #13 Demonstrator in Leadership in the US 2023-2024
 #21 Demonstrator in Team Building in the US 2023-2024


 KarensCardCorner
 Stamp with Amy K
 Stampin With Shirley G
 Tarabeth Stamps
 TL's Bright Spot
Awesome holiday card Mary! I have this stamp set and I really need to pull it out and play with it…thanks for the inspiration! 🙂
Thanks – it took me a minute, too. Too many fun sets all at once, I guess. But this one is really versatile! Enjoy it! 🙂
Mikey likes it! And so do I! Easily adaptable to other “present” situations in different colorways – and to a tag as well.
Yes indeed. I can’t believe I didn’t mention that!! Duh! Change the colors of the presents. Change up the sentiment. Happy Birthday! Happy Graduation! Lots of possibilities with this set. Thanks for reminding me, Mom! 🙂
Thanks for describing the “kissing” technique, Mary! I haven’t tried it yet, but it sure looks like fun! Thank you for your “presence” on the web. I learn so much from following your blog. Have a great Sunday.
It is a cool technique, Patricia. Lets you get a lot more looks from just one stamp set! I really appreciate you following me and taking the time each day to leave such nice comments! 🙂
So cute and I love the envelope, too!
Thanks, Jari – I like doing an envelope to complement the cards! 🙂