My Big Shot underwent exploratory surgery yesterday. My husband, who refused to scrub-and-glove before making the first un-screw, pulled out his various tools to make a differential diagnosis. Symptom? It didn’t work. Broken. Handle turned, but nothing would go thru the roller. So, we searched Google (as an aside – what if this had happened 20 years ago?!? Did Big Shots even exist then? Assuming they had – we’d have had to go to the Encyclopedia Britannica and look under B. For Broken Big Shot. Not sure that would have been all that fruitful. If you don’t even know what an Encyclopedia Britannica IS – well…. Google it!). But, thanks to Mr. Gore, the Internet exists (at least that’s what HE says!) and so does the knower-of-all-things….Google!
Regardless, Google came thru and we found directions for dissecting a Big Shot. Screws were loosened. Handle and sides removed. And what did we see???

Yep. The framelit for the baby toy whose name I don’t know was stuck down in the roller. I couldn’t find it the previous day when I was done with my baby card. Now I know why! Amazing that such a tiny piece could bring the whole thing to a screeching halt. But, halt it it did!! Wayne removed it – it’s a little worse for the wear, but I hope it will flatten out with some trips thru the now-repaired-and-working perfectly Big Shot.
Anywho – with everything working again, I tackled Sketch and Stamp Blog’s SB114:

Be sure to head over to Sketch and Stamp and check them out – their design team artists do wonderful work! In fact, my friend Amy Koenders is one of those folks, and I rather shamelessly drew from her great card for mine. Take a look-see:

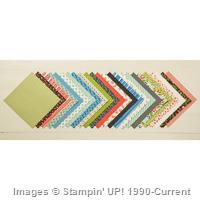
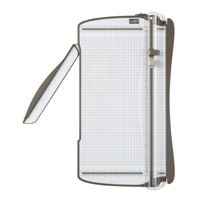
I started by SNAILing two pieces of the new Pretty Petals Designer Series Paper Stack to two pieces of Basic Black Card Stock. I’m some bit ashamed to say that I just made both pieces the identical size – to avoid doing any ciphering or figuring whatsoever! Then I laid the flower-dy one over the blue piece on the angle I needed. Then I turned both pieces over and, using my stylus, I outlined where to cut the flower-dy piece. Which I then did by carefully lining it up in my Stampin’ Trimmer. I SNAILd the resulting angular piece onto the card front.

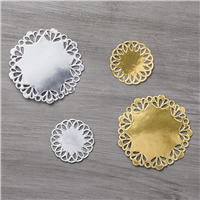
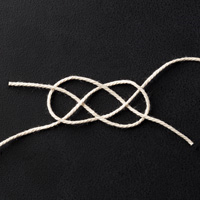
For the embellishment, I used two of the new Metallic Foil Doilies. On one of them, I squished the white side (the back of the silver doily) into Versamark Ink, sprinkled Black Stampin’ Emboss Powder on it, and heat embossed it with my Heat Tool. Then I layered it over a silver doily – offsetting it just a little bit – sticking them together with some Multi-Purpose Liquid Glue. I stuck a few Glue Dots on top of the black doily and then used them to make my loops of the new Very Vanilla Thick Baker’s Twine. I toyed with making more of a flower with the loops – so they’d have gone all the way around, but I decided to mirror the flowers on the DSP.

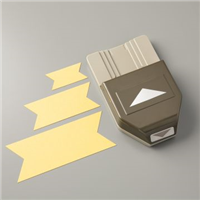
The sentiment banner is a piece of Very Vanilla, SNAILd to a mat o fBasic Black. I used the Banner Triple Punch to make the banner ends. The strips are smaller than the smallest width of the punch, so I just stuck it in and eyeballed it to make the cuts. Worked fine!
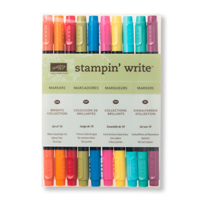
I stamped the Watercolor Wishes “Thanks”, using Versamark and then heat embossed it with more of the Black Emboss powder. To finish up the sentiment banner, I used my Pacific Point and Old Olive Stampin’ Write Markers to make three little flowers from the stamps in Floral Wings. Then I added three seed pearls to their centers. I adhered the finished banner to the card using strategically placed Stampin’ Dimensionals. The final step was to adhere the entire card front to my Very Vanilla card base using some more Dimensionals.

The inside of the card got another piece of Very Vanilla (just to add some “starch” to the card back) with a strip of the Pretty Petals on a strip of Basic Black. I repeated the Floral Wings flowers in the top corner – using my Pacific Point marker again.

Et Voila! The card was done, and the creator was happy! 🙂
See below for all the card cuts and products used in this card.
The Paper Pumpkin 50% off-for-the-first-two-months special is going on now! Take a gander below for the details.
Thanks for stopping by – see you tomorrow!
TTFN
Mary
P.S. Happy Birthday, Sally-Bak!! 🙂
WEEKLY DEALS FOR 21 Jul – 27 Jul 15!! Click here to see the Weekly Deals from Stampin’ Up! in my online store. The Weekly Deals are only while supplies last and only available at these great prices through 27 Jul!


Built for Free Using: My Stampin Blog


If you haven’t tried Paper Pumpkin yet – now might just be the perfect time to give it a shot!
Take a look at these videos highlighting Paper Pumpkin – see them in action! https://www.youtube.com/user/paperpumpkinvideo
Offer Dates: July 23-September 10, 2015
The Fine Print:
- For new subscribers only.
- Available for month-to-month subscriptions, not prepaid subscriptions.
- 50% Discount is applied to one kit per month for the first two months of a new subscription.
- After the first two months, the price for each month’s kit will go to the regular price: $19.95.
- Go to http://www.PaperPumpkin.com to join
- Enter the Promo Code: HALFOFF
- New subscribers must join by Thursday, September 10, 2015; 11:50 PM (MT).
STAMPIN’ UP PRODUCTS USED IN TODAY’S PROJECT:


Built for Free Using: My Stampin Blog
Card Cuts Used in Today’s Project:
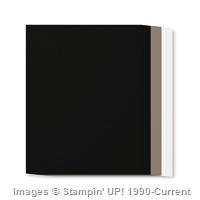
Very Vanilla Card Stock: 4 1/2″ x 11″ (card base – scored and folded at 5 1/2″); 3/4″ x 4″ (front sentiment banner); 4 1/8″ x 5 3/8″ (inner liner)
Basic Card Stock: 4 1/8″ x 5 3/8″ (2 each front mats); 7/8″ x 4 1/2″ (front sentiment banner mat); 3/4″ x 4 1/8″ (inner strip mat)
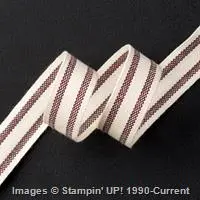
Pretty Petals DSP Stack: 4″ x 5 1/4″ (2 each top front mat); 5/8″ x 4 1/8″ (inner strip)
If you need any stamping supplies, I’d be very happy to be your Demonstrator. Just click on the Order Stampin’ Up! Online Now button on the right side of the screen to go directly to my online store or drop me an email if you have any questions. Happy Stamping!
Shop the Clearance Rack here.
Earn FREE Stampin’ Up! Products – Join my Punkin Head Peppermint Rewards – My online customer thank you program!
BACKORDER LIST AS OF 22 Jul 15
24 July
138706: Hey, Girl Photopolymer Stamp Set
27 July
138395: Expressions Natural Elements
138422: Tip Top Taupe 1″ Dotted Lace Trim
138425: Watermelon Wonder 1″ Dotted Lace Trim
28 July
117273: Antique Brads
29 July
138443: Cherry on Top Designer Series Paper Stack
31 July
135862: Gift Bag Punch Board
138401: Gold Metallic Thread
138402: Silver Metallic Thread
1 August
138288: Brick Wall Textured Impressions Embossing Folder (second shipment)
3 August
138447: Sweet Li’l Things Designer Series Paper
7 August
138295: Tree Builder Punch (third shipment)
138377: Cottage Greetings Card Kit (third shipment)
17 August
138378: Tin of Cards Project Kit (third shipment)
Date to be Determined
140406: Watercolor Wishes Card Kit (more information here)


 #20 Demonstrator in Sales in the US 2023-2024
 #13 Demonstrator in Leadership in the US 2023-2024
 #21 Demonstrator in Team Building in the US 2023-2024


 KarensCardCorner
 Stamp with Amy K
 Stampin With Shirley G
 Tarabeth Stamps
 TL's Bright Spot
Ahhh!! Not the Big Shot…so glad that you were able to remove the “foreign body” and get it working perfectly again. 🙂 Fantastic card! Love the colors and the mix of designer papers is perfect!
Yep – the Big Shot. My stomach SANK when the roller wouldn’t….roll! Thank goodness the surgery was successful. Thanks, Amy!
Love your take on this week’s sketch of Stamping and Blogging!
I always have problems using DSP on my cards, so thank you for showing me the way. 😉
Love it!
Also thanks for playing along with the sketch this week. Hope to see you again next week for some more inspiration. 🙂
You definitely will be seeing me. Thanks for the kind comment and thanks to you for providing us all with sketches to inspire us! 🙂