Merry Christmas! I know your kids are all being extra-good right now, since Santa Claus is coming to town! Have you got your stockings hu…..wait….WHAT!?
Christmas?
In JULY?!?! Well, sure – why not? Christmas in July – that’s a thing, right? I mean, I don’t know about you, but I’m already expecting to see Christmas decorations up in the stores. They start earlier and earlier every year, don’t they? Sometimes I think someone is going to get confused and put the Christmas trees up in Wally-world before they get the Amercian Flags and Red/White/Blue decor on the shelves… 😉
But, I wanted to do some playing with the Merry Moments DSP and the Festival of Trees stamp set. So, I decided to play like it was Christmas for a minute! Indulge me, and take a look-see!

The design of the card was inspired by Mojo Monday Card Sketch Challenge #407:

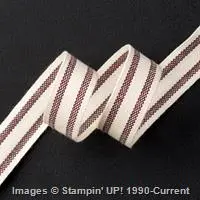
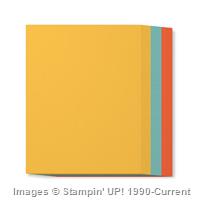
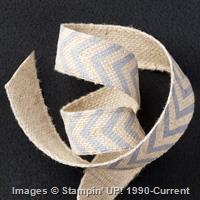
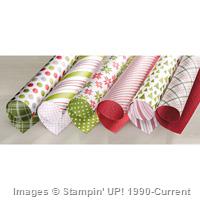
And the color were inspired by….Christmas! I started by cutting two pieces of the new Merry Moments DSP and SNAILing them to a Crumb Cake mat. Then I added a strip of Mossy Meadow Card Stock to create the sketch’s horizontal element. To that, I wrapped a strand of the new Cherry Cobbler Thick Baker’s Twine three times around the developing card front, securing it in the back with some regular ole tape.
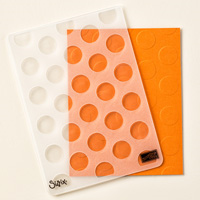
I ran a piece of Crumb Cake thru the Big Shot inside my Polka Dot TIEF. Then, I turned the paper over in the TIEF, offset the polka dots a little bit and ran it thru a second time. That gave me an emboss/deboss design (learned that one from Amy Koenders!!), which I then SNAILd to a Cherry Cobbler mat and adhered to the card front with Stampin’ Dimensionals.
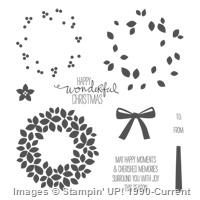
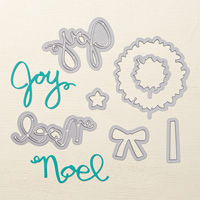
For the large round element, I figured the Wonderful Wreath die and the Wondrous Wreath stamp set were pretty obvious choices. So I used ’em! I stamped the wreath in Mossy Meadow and the berries (remember this is a two-step stamp set) in Cherry Cobbler. Then I cut it out with the matching Wonderful Wreath dies.
To attach it to the card, I first positioned it and determined where to stick just a couple of Stampin’ Dimensionals – I actually cut them down a little, because I only needed them behind the wreath on the very left-most side. The part over the Crumb Cake rectangle is adhered with SNAIL (this all was to compensate for the various thicknesses of my card front). Once I got it all stuck down, I trimmed the excess wreath with my snips!

Next I moved to the second round element of the sketch. Perhaps it’s apparent that a Christmas Tree is not round – but did I mention that I’d decided I was using that bundle (yes, I got it for 15% off!!) and so, by golly, I was USING that bundle! 😉 I decided that I’d just add a few circles behind the tree and then I’d be matching the spirit of the sketch!
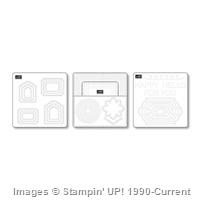
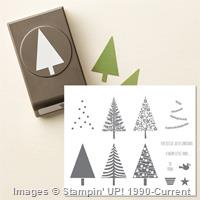
I started by stamping the floral-y tree stamp from Festival of Trees on a piece of Whisper White Card Stock. Then I stamped the berries in Cherry Cobbler. I also colored in all the little flower centers in Cherry Cobbler. Then I punched it out with the matching Tree Punch and SNAILd it to a piece of Mossy Meadow CS. Then I fussy cut that out, making a Mossy Meadow mat for my tree!
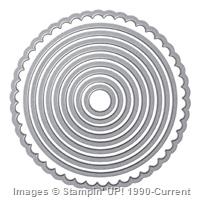
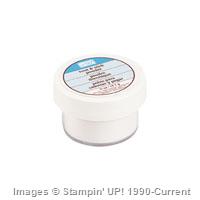
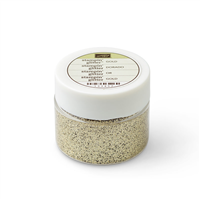
The circles are from the smallest and third-from-smallest circles in the Circles Collection Framelits, cut in Cherry Cobbler. On the larger one, I stamped the garland image from Festival of Trees in Versamark ink and sprinkled it with Heat & Stick powder. I hit it with my Heat Tool just until the powder stopped being powdery and started being glisten-y, then I sprinkled that with Gold Stampin’ Glitter. A final blast with the heat tool set the glitter.

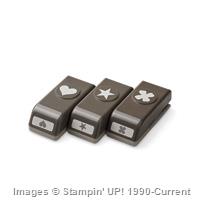
I adhered the circles – the large one has Dimensionals under the right side – same thickness compensation as I did with the Wonderful Wreath – and the remainder is SNAILd on. As is the smaller circle. Then I SNAILd the tree over the top. The star is from the Festival of Trees – using the Heat and Stick powder and glitter as before, and then punched out with the Itty Bitty Accents Punch pack star. A glue dot stuck him in place.
With that done, I finished up with the sentiment. I cut Noel (from the Wonderful Wreath Framelits set) twice – once in Cherry Cobbler and once in Mossy Meadow. Then I stuck the two die cuts together – a little offset to create a shadow and some dimension – with little tiny dots of Multi-Purpose Liquid Glue. The same kinds of little dots of glue adhered the layered piece to the card front.

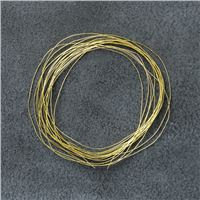
At that point, I put the card front onto a Cherry Cobbler card base with Stampin’ Dimensionals and then added the final touches. I stuck a Rhinestone Basic Jewel onto the smallest card stock circle (it just looked too plain to me!), and added the bow to the wreath. For the bow, I tied a double-strand bow with the Gold Metallic Thread and stuck it down with a glue dot. A second bow, using the Cherry Cobbler Thick Baker’s Twine, is stuck down with some Multi-Purpose Liquid Glue. Et Voila – the card front was done!
On the inside – I started with a liner of Crumb Cake, and stamped the sentiment from the Wonderful Wreath set in Cherry Cobbler. Then I laid several sticky notes over the sentiment and stamped the wreath image in Pear Pizzazz and the berries in Cherry Cobbler. When I pulled off the stickies, here’s what I got:

I added the bow in Cherry Cobbler and I was done! Christmas in July! Hope you like – and that you DON’T see any Christmas Trees in the stores for at LEAST a few more months. I can’t promise that you won’t see another Christmas-y project here in the next few days, though…. 🙂
See below for all the card cuts and products used in this card!
I’ve added the Weekly Bonus Deals quantity table down below. Remember these quantities are the ORIGINAL quantities for each item. Everything is in limited numbers and only while supplies last – then they revert to their original price…..
See you tomorrow!
TTFN
Mary
WEEKLY DEALS FOR 21 Jul – 27 Jul 15!! Click here to see the Weekly Deals from Stampin’ Up! in my online store. The Weekly Deals are only while supplies last and only available at these great prices through 27 Jul!


Built for Free Using: My Stampin Blog

STAMPIN’ UP PRODUCTS USED IN TODAY’S PROJECT:


Built for Free Using: My Stampin Blog
Card Cuts Used in Today’s Project:
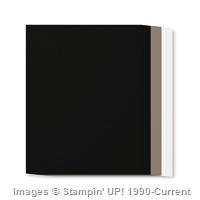
Cherry Cobbler Card Stock: 5 1/2″ x 8 1/2″ (card base – scored and folded at 4 1/4″); 2 7/8″ x 4 5/8″ (mat for embossed Crumb Cake piece); smallest and third-from-smallest Circles Collection side cuts (two circles under tree); “NOEL”
Crumb Cake Card Stock: 4 1/8″ x 5 3/8″ (front mat); 2 3/4″ x 4 1/2″ (embossed rectangle); 4 1/8″ x 5 3/8″ (inner liner)
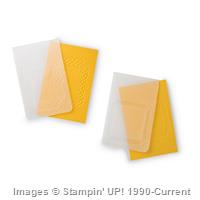
Merry Moments DSP: 2 1/2″ x 4″ (two for front mat)
Mossy Meadow Card Stock: 1/2″ x 4″ (front strip); “NOEL”
Whisper White Card Stock: wreath die cut and tree punch
Shop the Clearance Rack here.
Earn FREE Stampin’ Up! Products – Join my Punkin Head Peppermint Rewards – My online customer thank you program!
BACKORDER LIST AS OF 21 Jul 15
27 July
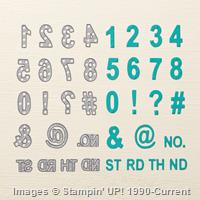
138395: Expressions Natural Elements
138422: Tip Top Taupe 1″ Dotted Lace Trim
138425: Watermelon Wonder 1″ Dotted Lace Trim
31 July
135862: Gift Bag Punch Board
138401: Gold Metallic Thread
138402: Silver Metallic Thread
1 August
138288: Brick Wall Textured Impressions Embossing Folder (second shipment)
3 August
138447: Sweet Li’l Things Designer Series Paper
4 August
131170: Subtles Collection Classic Stampin’ Ink Refills
7 August
138295: Tree Builder Punch (third shipment)
138377: Cottage Greetings Card Kit (third shipment)
17 August
138378: Tin of Cards Project Kit (third shipment)


 #20 Demonstrator in Sales in the US 2023-2024
 #13 Demonstrator in Leadership in the US 2023-2024
 #21 Demonstrator in Team Building in the US 2023-2024


 KarensCardCorner
 Stamp with Amy K
 Stampin With Shirley G
 Tarabeth Stamps
 TL's Bright Spot
None of your card pix opened???
Got ‘m now…hmmm…
Awesome card Mary!! Love that designer paper too, great take on the sketch. That flipped embossing trick is pretty cool, adds a great background for your card!! 🙂
Thanks, Amy! Learned it from you! 🙂
Such a pretty Christmas card! Love that wreath. Thanks for playing along with Mojo Monday!
Thanks!!
Love this card. It is now September and I am really into Christmas cards, so thanks so much for sharing!
Thank you, Susan. Seems Christmas starts earlier and earlier every year! 🙂