

Happy Monday, y’all – hope you had a great weekend! Ours was pretty chill. Fall is back and the leaves are starting to turn – my fave time of year!
My card today is a final Sneak Peek from the November 2026 Online Exclusives! Starting TOMORROW – it won’t be a “sneak peek” because you’ll be able to get all the new Online Exclusives (AND the new Hot Foil goodies, too!! BOOM!). For this birthday card, I used the new Funky Chunky Florals bundle and sentiments from the new Birthday Shoutout stamp set. Mosaic Garden DSP – from the Sep-Dec 2026 Catalog – helped out, too! Take a look-see:

The layout was inspired by this week’s Freshly Made Sketches challenge.


I did a quick video on how to make this card – which is posted on Instagram. If you’d like to give that a watch – click here!
I started by adhering a 3 7/8″ x 5 1/8″ piece of Mosaic Garden DSP to a Pretty Peacock mat.
My sentiment panel started as a 3 3/8″ x 4 5/8″ piece of Basic White cardstock. I made a little pencil mark 1/4″ down from the top right corner and 1/4″ up from the bottom left corner. Using my Paper Trimmer, I cut on a diagonal from mark-to-mark.

In the bottom corner of the bottom triangle, I stamped a pretty sentiment from the new (and wunnermus) sentiment-only Birthday Shoutout set (coming tomorrow – 3 Nov 2026) in Pretty Peacock ink.
Then I placed both pieces of the cardstock into the new Timeless Herringbone Embossing Folder (available 3 Nov 2026) and ran it thru the Stampin’ Cut and Emboss Machine! I adhered the two pieces to the card front – with a gap between them – using Stampin’ Dimensionals.

Then it was time to stamp some flowers and leaves!
I used the Funky Chunky Florals set to stamp:
– Two small flowers in Hydrangea Hue ink on Basic White cardstock.
– One small flower in Crisp Cantaloupe ink on Basic White cardstock. I used a small flower center to stamp in the middle of this one in Barely Blush ink.
– Two large flower centers in Crisp Cantaloupe on Basic White cardstock.
– Four leaves in Pretty Peacock ink on Basic White cardstock.
– One large flower in Hydrangea Hue ink on a piece of Hydrangea Hue paper from the Mosaic Garden DSP.
Using the dies in the Funky Chunky Florals set, I cut out all the images. These dies are cool – they cut INSIDE the edges of the stamped images – so…no white border! I also used the large die to cut out a flower from another piece of Hydrangea Hue Mosaic Garden DSP.

I adhered the two Crisp Cantaloupe flower centers to the Hydrangea Hue flowers with Liquid Glue. Using Liquid Glue, I adhered the two large die cut flowers to each other – with the stamped one on the bottom. I added the Crisp Cantaloupe small flower to the middle with Stampin’ Dimensionals.
I tied a Linen Thread bow and adhered it with a little Liquid Glue.

I adhered the leaves and small flowers with Liquid Glue and the large one on top with Stampin’ Dimensionals.
I added three Crisp Cantaloupe 2026-2028 In Color Butterflies – and clear Adhesive-backed Snowflakes to the middle of the flowers and the card front was done!

On the inside, I stamped a second Birthday Shoutout sentiment in Pretty Peacock ink on a 4″ x 5 1/4″ piece of Basic White cardstock. In the corner, I stamped the large Funky Chunky Florals flower in Hydrangea Hue, then added the large flower center in Crisp Cantaloupe.

I used Liquid Glue to adhere the panel to the inside of my Crisp Cantaloupe card base, popped the card front on with Stampin’ Dimensionals and the card was done!
My Basic White Medium Envelope got the Funky Chunky Florals flower in Hydrangea Hue and Crisp Cantaloupe on the front…

…and more of the Mosaic Garden DSP on the envelope flap.

Et Voila! The Funky Chunky Florals bundle lets you build flowers and flowers and flowers – as many and as varied as your imagination can come up with! And I love the no-white-borders feature of the dies! If you need to send birthday cards – and who doesn’t?! – the Birthday Shoutout set will be your GO-TO set for sentiments! And – new embossing folder!? Yes, please! Get the Timeless Herringbone EF tomorrow, too!

I hope you like – and…have added these new goodies to your list for tomorrow! 🙂
If you’d like to recreate this card, all the products and card cuts you’ll need are down below! And as mentioned above, I posted a quick video on how to make it out on Instagram. Here ’tis on YouTube if you’d like to take a look-see.
I’ve also created a printable PDF with written instructions and a list of the products used to create this project. You can download, print and/or save it by clicking this image:


Missed any tutorials? You can check out my past projects right here!
TTFN
M

Connect with me! https://campsite.bio/stampsnlingers

CUSTOMER REWARDS
Earn 10% of your retail amount on all orders of $20 or greater! And you’ll be earning Punkin’ Head Peppermints – one peppermint for each $25 you spend thru my Online Store! When you gather up 16 Peppermint Points – you’ll be able to select a $40 gift right from me!
You’ll also be getting a link to my ZOOM The Craftroom (an exclusive TWICE-A-WEEK online event for my customers) and the monthly Online Tutorial – featuring the Wrapped in Greenery Bundle for November orders.
See my Customer Rewards page for full details.


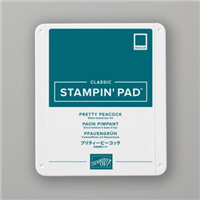
Get the Stampin’ Up! Products Used in this Project: You’ll also need the Funky Chunky Florals bundle, Birthday Shoutout stamp set and Timeless Herringbone EF when they’re available!







Card Cuts Used in This Project:
Crisp Cantaloupe Cardstock: 5 1/2″ x 8 1/2″ (card base – scored and folded at 4 1/4″)
Pretty Peacock Cardstock: 4″ x 5 1/4″ (mat for card front)
Basic White Cardstock: 3 3/8″ x 4 5/8″ (sentiment panel cut on the diagonal); stamped and die cut Funky Chunky Florals flowers, flower centers and leaves; 4″ x 5 1/4″ (inner liner)
Mosaic Garden DSP: 3 7/8″ x 5 1/8″ (card front); large die cut Funky Chunky Florals flowers; 2 1/4″ x 6″ (envelope flap)
If you need any stamping supplies, I’d be very happy to be your Demonstrator. Just click on the Order Stampin’ Up! Online Now button on the right side of the screen to go directly to my online store or drop me an email if you have any questions. Happy Stamping!
Shop the Last Chance List here. Earn FREE Stampin’ Up! Products – Join my Punkin Head Peppermint Rewards – My online customer thank you program!
Finn Fan Fix 

We, too, happens to like shrimp boils, Dad!!

Sadly – he was WAAAY to tidy and not even ONE shrimp fell to the floor!
TTFN
M