
Good morning, y’all! It’s Thursday – which means it’s time for another Happy Inkin’ Thursday Blog Hop. We’ve got a color challenge to work with and I’m excited to see what everyone brings to the table. I just know you’re going to see a ton of awesome-ness on the hop today!
I give a lot of gift cards at Christmas. Don’t judge! They’re easy for me – and pretty much always the perfect size/color/flavor for the folks who get them. But…I DO like to give them in a cute Gift Card Holder and that’s what I’ve made for you today! It’s a pop-up Gift Card Holder and it features the Humble Home stamp set and punch, the gorgeous Sentimental Christmas DSP and…a NEW punch called the To The Point Label Punch (which you’ll be able to get on 7 Jan!). Take a look-see:

And – here’s our challenge color combo!

The gift card holder itself is a 4 1/4″ x 9″ piece of Sentimental Christmas DSP (this is on the Last Chance List and was Low Inventory yesterday so…if you want some…hurry quick!).
Using my Paper Trimmer, I scored the piece of DSP on the long side at 1 5/8″, 4 3/8″, 5 5/8″ and 6 7/8″.

I folded all but the 5 5/8″ score line as “valley” folds – with the side of the DSP that I wanted to see (the striped side) on the outside of the folds.

Then I folded the 5 5/8″ score as a “mountain”.
Using my Paper Trimmer, I then cut the 5 5/8″ score to make two pieces.
I put Tear & Tape Adhesive on one side of the panel – keeping it close to the edge – and to the score line.

Using the Tear & Tape, I adhered the two panels to each other (placing striped-side to striped side) to make the pop-up section (where the gift card goes).

Using the new To The Point Label Punch (available in the Jan-Apr 2024 Mini on 7 Jan) I pushed the joined piece into the end – part way – and punched it out.

That made the pop-up section to hold the gift card.

On a piece of Basic White cardstock, I stamped the Humble Home “roof” image in Pecan Pie ink. Then I added the sentiment from the set in Poppy Parade and the door/windows image in Pecan Pie ink. I adhered the panel to the inside panel of the gift card holder.

I put an old gift card into the holder and then closed it up. Note: it’ll help if you put a gift card or a credit card in place while you make the belly band – that way you’ll know how thick your holder will be and thus how long to make the belly band! 🙂

I wrapped a 1″ x about 9 1/2″ strip of Pecan Pie cardstock around the holder and secured the ends together (at the front) with Tear & Tape Adhesive. Note: just wrap the band around sorta tight, sorta loose. You don’t want it falling off but…you ALSO don’t want it so tight your recipient tears it trying to get to the prize inside! In the immortal words of Little Red Riding Hood….you want it Juuuuuust riiiiiight…..! 😎

I used Liquid Glue to adhere a strip of snowflake-strewn Sentimental Christmas DSP on the front and back of the belly band.
Using Glue Dots, I adhered a loose figure-8 of new Gold Twisted Thread to the front of the bellyband. Note: wrap the thread three times around four fingers and then twist it once into a figure-8 and adhere it with the Glue Dots.

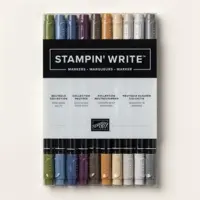
On a piece of Basic Beige cardstock, I stamped the Humble Home gingerbread house in Poppy Parade ink. I colored the roof with the Pecan Pie Stampin’ Write Marker and the scallops and window trim with the Shaded Spruce Stampin’ Write Marker. Then I punched it out with the bundled Humble Home Builder Punch.

I adhered it over the thread with some Stampin’ Dimensionals.
For the back, I used the new To The Point Label Punch to cut out a Basic Beige label. On it, I stamped the sentiment from Humble Home in Poppy Parage ink. I added the wreath at the top in Shaded Spruce – and colored it with a Shaded Spruce and Poppy Parade Stampin’ Write Marker.

I adhered it to the back of the bellyband with Liquid Glue.
I added a few champagne Drusy Adhesive-backed Dots to the front of the bellyband and…my Pop Up Gift Card Holder was done!

Et Voila! There’s not even one thing wrong with giving a gift card – but…it doesn’t hurt to make some cute packaging! The Sentimental Christmas DSP and Humble Home stamp set and bundled punch make for a fun presentation! And – I love how nicely the new To The Point Label Punch filled the bill for the back “tag”!

I hope you like!
If you’d like to recreate this project, all the products and card cuts you’ll need are down below!
I’ve also created a printable PDF with written instructions and a list of the products used to create this project. You can download, print and/or save it by clicking this image:

Missed any tutorials? You can check out my past projects right here!
Now that you’ve seen my card, take a minute to hop thru all our projects today. If you click on the Next Blog button, you’ll go right to Jaimie’s page. And you can just click on the names below to go direct to all the blogs!

Mary Deatherage – This is me! 😎
Have fun on the Hop!!
TTFN
M

Connect with me! https://campsite.bio/stampsnlingers

Thursday After Lunch Bunch

I’m planning to go live today on my Stamps-N-Lingers YouTube Channel with a new project for you – whoo-hoo!! We’ll start at our normal time of 1pm Eastern. Come on over and see what I’m up to today! Look forward to seeing you then!
WANT TO JOIN US?
If you’d like to join our team, we’d love to have you! You can become a demonstrator for just $99! We welcome all types of Demonstrators from those only purchasing to get the discount for themselves to those who want to run a business and those anywhere in between! Look at those faces – you KNOW we have a lot of fun! 🙂

When you purchase the Starter Kit for $99 + taxes (if applicable), the kit ships for FREE and you get to pick $125 in Stampin’ Up! merchandise.
Head over to my Join My Team page here to see all the benefits of being a Demonstrator! I’d love to have you on my team and help you get all the discounts, and early goodies, and…ALL THE THINGS! 🙂
If you have any questions about joining, please drop me a note at stamps-n-lingers@comcast.net, I’d love to chat with you!
You can also see additional information on my Stampin’ Up! site here!

Click here to purchase your Starter Kit and Get Started!
Get the Stampin’ Up! Products Used in this Project: You’ll also want the To The Point Label Punch when it’s available (or…use a different shape for the back of the bellyband!)


Card Cuts Used in This Project:
Basic Beige Cardstock: Humble Home stamped and punched shape on bellyband front; To The Point Label punched shape on bellyband back
Pecan Pie Cardstock: 1″ x 9 1/2″ (bellyband)
Basic White Cardstock: 2 3/8″ x 4 1/8″ (inside panel)
Sentimental Christmas DSP: 4 1/4″ x 9″ (gift card holder, scored and folded as shown in template); 7/8″ x 4 1/8″ (x2 – strips on front and back of bellyband)
If you need any stamping supplies, I’d be very happy to be your Demonstrator. Just click on the Order Stampin’ Up! Online Now button on the right side of the screen to go directly to my online store or drop me an email if you have any questions. Happy Stamping!
Shop the Clearance Rack here. Earn FREE Stampin’ Up! Products – Join my Punkin Head Peppermint Rewards – My online customer thank you program!
Finn Fan Fix 
No FFFs on Blog Hop Days!
TTFN
M


 #20 Demonstrator in Sales in the US 2023-2024
 #13 Demonstrator in Leadership in the US 2023-2024
 #21 Demonstrator in Team Building in the US 2023-2024


 KarensCardCorner
 Stamp with Amy K
 Stampin With Shirley G
 Tarabeth Stamps
 TL's Bright Spot
Thanks for instructions. Great gift card holder.
Thanks! It’s super easy! 🙂
So cute!! 😊
Thanks, Akiko! 🙂
Such a cute gift card holder! Love the paper that you’ve used too! 🙂
Thank you, Amy! 🙂
Super cute gift card holder! Great instructions! TFS
Thanks – glad you liked it! 🙂
So cute Mary 🙂 This is such an awesome gift card holder, and you get to see both sides of the pretty DSP. LOVE it!!
Thank you! 🙂
Sweet gift card holder! Love the pop up mechanism!
THanks, Carol! 🙂