Good morning, y’all! Hope your weekend is going well! We had a nice time with our friends yesterday before my YouTube video (we ALMOST didn’t get back in time for the video – I looked at my watch and…we had 20 min to get home! 😳😳). And then on the way, there was a little dog in the road – and he was standing right in front of the van – would NOT move. So…naturally, we had to pick him up. After a few minutes we were able to find his family – he’d gone walk-about – and I (sort of reluctantly, I admit – he was VERY cute and VERY sweet!) handed him over. And we beat feet (or tires?) back to the house. I quite literally walked in the door with 30 sec to start time! Yikes!
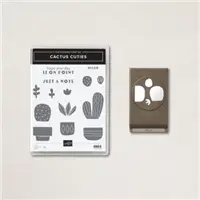
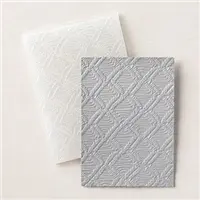
The card I made for you uses a sweet little set – sort of a flyover – it took me a minute to get it, myself! – called the Cactus Cuties bundle. I also pulled out the retiring-soon-and-on-sale-now-for-20%-off! Macrame 3D Embossing Folder. And you MIGHT see a brand new goody, too! Take a look-see:

The color palette for this one is from the Global Design Project color challenge this week.

If you were able to join me last night for my almost-late YouTube video, I appreciate you spending part of your weekend with me! If not and you’d like to see how to make this cutie, here’s the replay on YouTube!
I started by stamping the little flower image from the Cactus Cuties set in Whisper White Ink all over an Early Espresso cardstock panel. Then I used Liquid Glue to adhere the panel to a Blushing Bride mat.
Next – using the largest banner die in the coming-soon-in-the-new-Annual-Catalog Stylish Shapes Dies…

…I cut out four banners from more Early Espresso cardstock. I embossed them all in the Macrame 3D Embossing folder and adhered them to the card front with Liquid Glue. I sort of staggered them on the card front.

Using Stampin’ Dimensionals, I adhered a Basic White circle that I’d cut with the next-to-largest Stylish Shapes circle die (it’s about 2 1/2″ across).
On a piece of Basic White I stamped the various Cactus Cuties cactus shapes in Soft Sea Foam ink. I used the Cactus Builder Punch to cut out the barrel cactus and the small “ear” pieces. I fussy cut the two-arm Saguaro cactus.

Then I stamped the little flower again – twice in So Saffron and twice in Blushing Bride – and cut them out with the Cactus Builder Punch.
Then I stamped two pots – one in Early Espresso (which I cut with the punch) and one in So Saffron (which I fussy cut).

Using Liquid Glue, I adhered all the little cacti pieces together and added the pots, too.
I adhered the barrel cactus to the circle, using Liquid Glue and a few Stampin’ Dimensionals on the top “branch”. Then I popped the saguaro on with Stampin’ Dimensionals – including a double-stack of Dimensionals under the top of the longest arm
I tied a little bow from two lengths of white Baker’s Twine and adhered it with a Glue Dot.

I stamped the Cactus Cuties sentiment in Blushing Bride on Basic White and cut it with the smallest banner in the Stylish Shapes die set. I popped it onto the card front with Stampin’ Dimensionals.
Finally, I added some white Classic Matte Dots to both cacti and the card front was done.
On the inside, I stamped another Cactus Cuties sentiment in Blushing Bride on a Basic White panel. Then I stamped the saguaro in Soft Sea Foam and added a few flowers in So Saffron.

I used Liquid Glue to adhere the panel to a Blushing Bride mat and into my So Saffron card base, popped the card front on with Stampin’ Dimensionals and the card was done.
My Basic White Medium Envelope got more Cactus Cuties on the front….

…and…even more on the envelope flap!

Et Voila! Yep – it’s an easy bundle to miss, but…Cactus Cuties for sure lives up to its name, doesn’t it?!? I love that it’s a punch bundle, too! Do NOT miss the opportunity to get the Macrame 3D Embossing Folder before it’s gone-baby-gone! I mean – it’s on sale and everything! And…I’m not saying even one more word about the new Stylish Shapes dies. Just…3 May. Get them FIRST! 😉

I hope you like!
If you’d like to recreate this card, all the products and card cuts you’ll need are down below!
And…I’ve also created a printable PDF with written instructions and a list of the products used to create this project. You can download, print and/or save it by clicking this image:

Missed any tutorials? You can check out my past projects right here!
TTFN
M

Connect with me! https://campsite.bio/stampsnlingers
P.S. If you’ve been waiting for my Paper Shares for the new 2022-2023 Annual Catalog – tomorrow’s the day! I’ll post all the deets and the ordering form so you can get your share of the goodies! 🙂
HOST CODE FOR 1 APR – 15 APR: EHXUWRYF
Use this host code when you order $50 or greater and receive a free gift (AND the Monthly Card Tutorial) from me! If your order is over $150, please do not use this code, but you’ll still get the free gift. The free gift is your choice of any item valued up to $10.00 in any active Catalog! That includes some of the Host Exclusive stamp sets! See my Customer Rewards page for full details.
Note: Make sure that you can see my name on the final checkout page listed as your Demonstrator when you order so that you know that you’re ordering with me and you’ll get my rewards!
You’ll also be getting a link to my ZOOM The Craftroom (an exclusive TWICE-A-WEEK online event for my customers) and the monthly Online Tutorial. The April Tutorial features the Flowering Tulips Bundle!


It’s hard to believe, but…the new 2022-2023 Stampin’ Up! Annual Catalog will be here soon! Like…end of this week!! Whoo-hoo!

Here’s the deets:
- The big batch of new Annual Catalogs went out to my customers on Friday – so…y’all be looking for happy mail coming SOON!
- If you’re NOT a current customer of mine but would LIKE to be and would like to get a copy of the upcoming catalog, simply place an order through my online store and I’ll get a package made up for you, too!
- Ordering from the new Annual Catalog starts on 3 May 2022!
Let me know if you have any questions.
If you didn’t get a chance to see the “unveiling” of some of the super goodies in this new catty – check it right here!
And – if you’re interested in joining the team, then YOU can preorder right now, too – and get the discount for yourself! You can choose to add items from the Pre-Order list to your Starter Kit – pick $125 worth of product and pay just $99 plus tax – and you’ll even get FREE SHIPPING! Head over to my joining page here to see the benefits of being a Demonstrator and to sign up now! I would love to have you on my team and help you get all the discounts, and early goodies, and…ALL THE THINGS! 🙂
The 2021-2022 Annual Catalog Last Chance Products Sale

You’ve been waiting and now is the Time! The Last Chance Products are available for you to order!!
Stock up on your favorite products before they’re gone for good! Save up to 50% on essential craft supplies. Please note – this selection of Last Chance Products is only available while supplies last!!
DEETS:
- Each Last Chance Products promotion typically includes a Retiring List (products that will no longer be available once the catalog retires) and a Carryover List (products that will still be available once the catalog retires). For this catalog’s Last Chance Products promotion, a Carryover List will not be provided; carryover products can be viewed in the 2022–2023 Annual Catalog.
- All products are available while supplies last, and there are no purchase limits.
- Discounted items can be added to a Starter Kit and redeemed as a 50% off item or with Stampin’ Rewards. Whoo-hoo!
- Only orders opened and closed during the promotion period apply.
- Stamp Sets are not guaranteed during this promotion and are while supplies last.
ORDER DEADLINE
- 2 May 2022 at 11:50 PM (MT) – but remember that these things are while supplies last – when they’re gone they’re gone!
Click here to go right to the Last Chance Products in my Online Store!
Get the Stampin’ Up! Products Used in this Project:


Card Cuts Used in This Project:
So Saffron Cardstock: 4 1/4″ x 11″ (card base, scored and folded at 5 1/2″)
Blushing Bride Cardstock: 4″ x 5 1/4″ (x2 – mats for card front and for inner liner)
Early Espresso Cardstock: 3 7/8″ x 5 1/8″ (card front); Largest Stylish Shapes banner die cut (x4)
Basic White Cardstock: Third-from-largest Stylish Shapes circle die (behind cactus); Stamped and fussy cut Cactus Cuties images; Smallest banner Stylish Shapes die cut (sentiment); 3 7/8″ x 5 1/8″ (inner liner)
If you need any stamping supplies, I’d be very happy to be your Demonstrator. Just click on the Order Stampin’ Up! Online Now button on the right side of the screen to go directly to my online store or drop me an email if you have any questions. Happy Stamping!
Shop the Clearance Rack here. Earn FREE Stampin’ Up! Products – Join my Punkin Head Peppermint Rewards – My online customer thank you program!
Finn Fan Fix

TTFN


 #20 Demonstrator in Sales in the US 2023-2024
 #13 Demonstrator in Leadership in the US 2023-2024
 #21 Demonstrator in Team Building in the US 2023-2024


 KarensCardCorner
 Stamp with Amy K
 Stampin With Shirley G
 Tarabeth Stamps
 TL's Bright Spot
Such a cute card! Love the colors, perfect layering too! 🙂
Thanks, Amy! 🙂