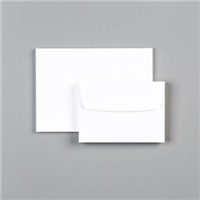
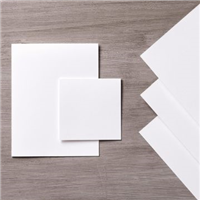
My card share for you today is super SUPER easy! It uses but one stamp set – the wondrous Water Color Wishes. And you can make it with a pack of Whisper White Note Cards and Envelopes and some of your leftover Holiday papers. Or any Designer Paper for that matter!
I saw this design over on Mary Fish’s website, she’d CASE’d it from another website, so it’s going around! Mary did hers with some of the In Colors Designer Specialty Paper – all the circles were the same color, just a different pattern – and used Cottage Greetings for the stamp set. And I loved her card so much that I immediately wanted to CASE it. I decided to go in a holiday direction with a little more diversity in the patterns and colors. This design will let you use any paper you like!
Take a look-see:

But wait! That’s THREE different cards! What in the world?!? Yep – one design. Three cards – and an infinite number of further possibilities. How fun would these be in a gift set? Maybe 4 of each design? In a box that you make – custom! – to coordinate with everything? Check how to do that here…
Let me tell you how to make these pretty little Thank You notes, using the wonderful stamp set called Watercolor Wishes. If you haven’t seen what this set can do – you owe it to yourself to check it out. The sentiments alone are worth getting the kit, but you also get everything you need to make 20 different and unique cards!
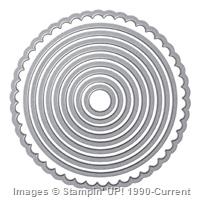
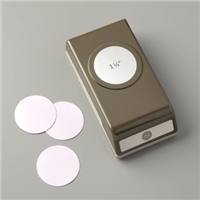
Anywho….you’re going to start with a Whisper White Note Card. Cut 4 circles from coordinating papers. For the first card, I used papers from the Merry Moments DSP. I chose 4 designs that featured Cherry Cobbler. The circles were cut with my 3rd-from-the-center Circles Collection Die – and they have a diameter of about 1 3/8″. If I had the 1 3/8″ Circle Punch – I would have used that. But, contrary to what my husband believes….I do NOT own EVERY item in the Stampin’ Up! Catalog! 🙂 So I used what I have. And I like how it worked out! (But, that Punch IS on my list….)

After I had my circles cut out, I laid them out along the side of my card, getting the spacing as even as I could. As you can see, the top and bottom circle hung off the card. That’s okay. I used Multi-Purpose Liquid Glue to adhere them to the card – you kind of want that few seconds to wiggle them around if you need to. SNAIL won’t let you do that! Once they’re glued on, I let them dry for a few moments, and then I trimmed the excess paper off the top and bottom circles with my Paper Snips. Note – my hubs suggested I just “fold the extra over” to take care of those circles. Somehow, trimming them seemed like a much better idea! 😉

The sentiment is stamped in a coordinating color – I’ll give you the list below – on a 3/4″ strip of Whisper White Card Stock. I trimmed the end into a banner using my Hexagon Punch and made the left side just a straight cut with my snips. Each card got a little embellishment from an Itty Bitty punch of some design. The one above is a little tree from a retired punch (sorry!).
I edged the sentiment banner with the matching Stampin’ Write Marker – if you don’t have the markers, don’t worry about it! Then I popped them onto the card with Stampin’ Dimensionals.

The insides of the cards I left completely blank. The Note Cards aren’t huge – which is good – and I wanted to leave as much space as possible for writing a thank-you note!
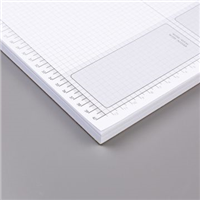
How to make these quickly-ier if you’re making a whole bunch? Well, my hubby would tell me to make a “jig”. That’s a welding thing – you make a giant steel….thing…that you can fit all your pre-cut pieces of steel into and then they all just fit together and you weld the joints. Then you take the completed item off and start again.
So – I made a “card-jig”:

I used the Grid Paper and my first card to line up where the circles needed to be (you can see the vertical lines at the top and bottom defining the edges of the circles and the horizontal lines on the side for the spacing). Then I stuck my second blank Note Card in….

And I was ready to roll! Cut – glue – sentiment – done!
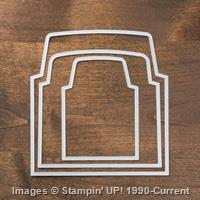
But wait! What if, like a kinda famous N’Awlins chef, you wanted to spice it up a little?!?

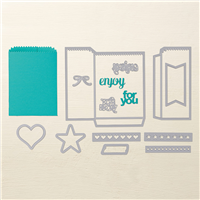
BAM!! You’d use your middle Envelope Liner Framelit to cut a piece of the paper that you used on your card, of course! And there it is! Perfection!

Three Cards. One Design. Infinite possibilities!
Here are the combos:
Card 1:
- Merry Moments DSP
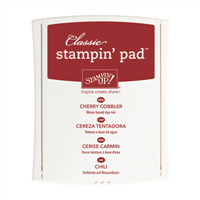
- Cherry Cobbler Ink for the Watercolor Wishes Sentiment
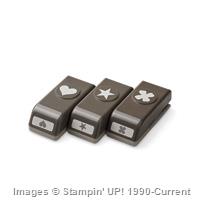
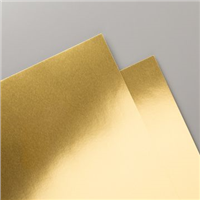
- Embellishment: Gold Foil Bitty Star from the Itty Bitty Accent Punch Pack
Card 2:
- Home for Christmas DSP
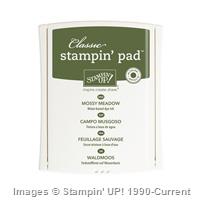
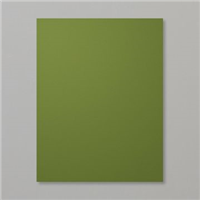
- Mossy Meadow Ink
- Embellishment: tree in Mossy Meadow Card Stock (you could use a heart or star from the Itty Bitty Accent Punch Pack if you don’t have this punch!)
Card 3:
- Season of Cheer DSP
- Night of Navy Ink
- Embellishment: heart in Cherry Cobbler Card Stock punched from the Itty Bitty Accent Punch Pack
The fun thing about this design is its flexibility – it could be any kind of card you like. Just change up the sentiment – and the Watercolor Wishes set has a bunch to choose from!
Hope you like!
TTFN and see you tomorrow!
Mary
WEEKLY DEALS FOR 15 Sep – 21 Sep 15!! Click here to see the Weekly Deals from Stampin’ Up! in my online store. The Weekly Deals are only while supplies last and only available at these great prices through 21 Sep!


Punkin’ Head Rewards 2.0

- For each $25 that you order from my online store (before S & H) you will earn one Peppermint.
- You will earn one Peppermint for each friend that you refer when they place their first order of $25+ from my online store.
- When you have earned 16 Peppermints you can order any product(s) with a value up to $40.00, your choice and mailed directly to you! That’s FREE shipping, too!
NO MONTHLY COMMITMENT and BECOMING A MEMBER IS FREE AND AUTOMATIC – Just place a $25.00 or greater online order through me (must be a SINGLE order of $25 or higher before shipping and tax) online. For every full increment of $25.00 (before shipping and tax), you earn one Peppermint. Individual orders may NOT be combined to attain a Peppermint. Example: a product order of $24 would not qualify for a Peppermint. However, an order of $51 would qualify for TWO Peppermints (and, if you’ve been following along, ANY Punkin-Head worth the name wants MORE MORE MORE Peppermints!). Please note, when shopping online make sure that you are shopping in my online store otherwise your orders won’t count toward your Punkin Head Peppermint Reward totals.
If you want to know the back-story on how the Punkin’ Head Rewards program came to be called such….head over to the Rewards Page!

To show our support for Breast Cancer Awareness Month, we’re going PINK . . . or at least our October boxes are! And because we know our subscribers want to share the love too, we will be making a donation on their behalf to the Breast Cancer Research Foundation (BCRF).
Stampin’ Up! will donate
- $1 for every active Paper Pumpkin subscriber.
- Plus, an additional $1 for every new subscriber.
- Together, we will make a difference!
Here’s how you can help:
- Subscribe! If you’re new to Paper Pumpkin, click here to get started. Your first kit will arrive in a limited-edition pink box that you’ll want to hold onto forever-and we’ll donate $2 because you’re new!
- Stay active! If you’re a subscriber, keep your subscription active so we can donate $1 for you. Only those who receive the October shipment will be counted for the donation.
- Spread the word! Help us get as many new subscribers as possible. Every current subscriber adds $1 and for new subscribers it’s doubled, so let’s get the word out and raise as much as possible.
Additional Details:
- New subscribers are those who signed up between September 11 and October 10, 2015 and have not been a Paper Pumpkin subscriber at any time in the past.
- All funds will be donated in US dollars.
- Mini spoiler alert! The October project inside the pink box is just as awesome as always, but we should probably let you know that it is not a pink project. That’s all we’re saying. 😉
- Funds will be donated based on number of subscribers instead of boxes shipped. But, if you want more than one pink box, you can always increase your subscription quantity by logging into your account at PaperPumpkin.com before October 10.
STAMPIN’ UP PRODUCTS USED IN TODAY’S PROJECT:


Built for Free Using: My Stampin Blog
Shop the Clearance Rack here.
Earn FREE Stampin’ Up! Products – Join my Punkin Head Peppermint Rewards – My online customer thank you program!
BACKORDER LIST AS OF 15 Sep 15
14 September
138295: Tree Builder Punch
139673: Woodland Textured Impressions Embossing Folder (more details)
15 September
139821: Happy Scenes Photopolymer Stamp Set
140365: Wonderland Clear Stamp Set
140392: Versatile Christmas Clear Stamp Set
140932: Basic Gray Archival Stampin’ Pad
16 September
103684: Adhesive Remover
138395: Expressions Natural Elements (529 backordered; 5,992 expected)
17 September
138309: Fine-Tip Glue Pen (1,918 backordered; 6,900 expected)
139607: Red Foil Sheets (2,192 backordered; 6,000 expected)
139463: Reindeer Paper Clips (more details)
18 September
139622: Spider Web Paper Doilies (more details)


 #20 Demonstrator in Sales in the US 2023-2024
 #13 Demonstrator in Leadership in the US 2023-2024
 #21 Demonstrator in Team Building in the US 2023-2024


 KarensCardCorner
 Stamp with Amy K
 Stampin With Shirley G
 Tarabeth Stamps
 TL's Bright Spot
These are so cute! Love that you’re getting a head start on those holiday thank you notes…I need to finish up my holiday cards first!! Love your husband’s suggestion to fold the circle die cuts over rather than snipping them off…I think that he just came up with his own new technique! 😉
Oh – did you think I meant to use these MYSELF?!? LOL!!! Thanks, Amy! 🙂
Great idea to go around the sentiment with a marker pen!
I like doing it – it sets the banner off a bit and just seems to “finish” it off. Thanks! 🙂
Love all of these, so cute!
Thanks, Jari!
Nifty idea…Nifty execution!
Thanks, Mom!
Love the cards, Mary! And thanks for the “card-jig” idea!!! That hubby is so smart–think I’ll fold the top and bottom over 🙂 LOL
Yes – it’s definitely an idea….. the jig thing IS good, though! LOL. Thanks 🙂