

Good morning, y’all! Hope your weekend is going well!
As the second installment in my Twelve Saturdays of Christmas Cards, I made a cute little number from the A Little Christmas DSP and the coordinating Christmas Mice bundle. Take a look-see:

The layout was inspired by the Try A Sketch on Tuesday challenge sketch.


To start off, I used Liquid Glue to adhere a 4 1/4″ x 5 1/2″ piece of A Little Christmas DSP on the front of my Very Vanilla card base.
I trimmed down a “scene” panel from A Little Christmas DSP to a finished size of 3 1/4″ x 4 3/8″. Then I used a Paper Trimmer to cut it into five 7/8″ x 4 3/8″ strips.
I used Liquid Glue to adhere the strips to a 3 3/8″ x 4 3/4″ piece of Cherry Cobbler cardstock. Tip: Use your Crafting Grid Paper to help – lay out your strips on the cardstock panel. Then adhere the left and right strips, then the middle strip. Finally, add the two remaining strips – making the distances between them equal.

Using Liquid Glue, I adhered the panel to the card front – up in the top right hand corner.
Using the die in the Christmas Mice set, I cut a Christmas tree from the Light side of a piece of Mossy Meadow Two-tone cardstock and adhered it to the card front with Liquid Glue.

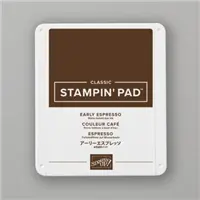
On a piece of Very Vanilla cardstock, I stamped a little Christmas Mice mouse, a Santa Hat and a candy cane in Early Espresso ink. I used the dies in the set to cut them out.
I also cut out the stack of presents from Very Vanilla cardstock and two stars, a “dotted” rectangle and a gift bow from Timeless Metallics Specialty Paper.
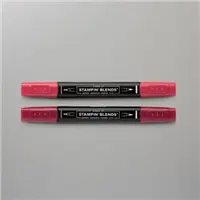
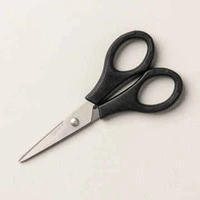
I used my Detail Scissors to cut the bottom-most “gift” from the die cut stack. Then I colored the remaining “bottom” rectangle (gift) with my Light Cherry Cobbler Stampin’ Blend.

Using Liquid Glue, I adhered one of the stars to the top of the Christmas tree, one at the top of the stack of gifts, the gift bow to the third gift and the “dotted” rectangle to the gift I’d colored with the Cherry Cobbler Blend.
Then I adhered the presents to the card front with Liquid Glue.
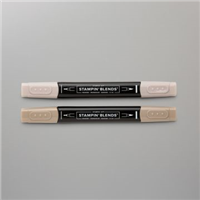
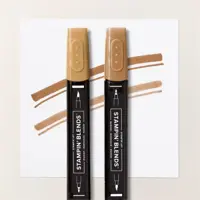
I colored the mouse with the Dark Petal Pink Stampin’ Blend (inner ear) and then the Light Crumb Cake and Light Pecan Pie Stampin’ Blends. I colored the hat and candy cane with the Cherry Cobbler Blends.

I tucked the candy cane under the mouse’s arm (the die cuts that so it’s easy!). On a 7/8″ x 2 3/4″ piece of Very Vanilla cardstock, I stamped a Christmas Mice sentiment in Cherry Cobbler. Then I snipped an angle on one end and slid it under the mouse’s arm (over the candy cane. I used Liquid Glue to keep everything in place.
Using Stampin’ Dimensionals – I adhered the total “package” to the card front.
I cut the “tail” from the end of the Santa hat. Snipping a little slit in the top of the cap, I slid it “onto” his head – securing it with a Dimensional and a little Liquid Glue.
I added the “tail” of the hat with another Dimensional.

I added some Christmas Epoxy Shapes – to the tree and one hanging from the Christmas hat – and the card front was done!
On the inside, I stamped a second Christmas Mice sentiment Cherry Cobbler on a Very Vanilla panel. Then I stamped and colored the Santa hat (in Early Espresso ink and the Cherry Cobbler Blends). I “hung” another Christmas Epoxy Shapes ornament from the hat, too!

I used Liquid Glue to adhere the panel to the inside of the Very Vanilla card base and the card was done!
My Basic White Medium Envelope got the Christmas Mice Santa hat on the front…

…and more of the A Little Christmas DSP on the envelope flap.

Et Voila! Well – the Christmas Mice bundle is just too cute – and all the dies in the bundle make it fun and easy to make little mouse scenes – all ready for Christmas! The coordinating A Little Christmas DSP is gorgeous – with “scene” panels as well as plaids and stripes and other pretty designs!

I hope you like!

If you’d like to recreate this card, all the products and card cuts you’ll need are down below! And – this is the card I made in yesterday’s Saturday Nite Live YouTube Video. If you’d like to see it – for the first time or again! – here ’tis!

I’ve also created a printable PDF with written instructions and a list of the products used to create this project. You can download, print and/or save it by clicking this image:


Missed any tutorials? You can check out my past projects right here!
TTFN
M

Connect with me! https://campsite.bio/stampsnlingers
CUSTOMER REWARDS
Earn 10% of your retail amount on all orders of $20 or greater! And you’ll be earning Punkin’ Head Peppermints – one peppermint for each $25 you spend thru my Online Store! When you gather up 16 Peppermint Points – you’ll be able to select a $40 gift right from me!
You’ll also be getting a link to my ZOOM The Craftroom (an exclusive TWICE-A-WEEK online event for my customers) and the monthly Online Tutorial – featuring the Noel Tidings Bundle for October orders.
See my Customer Rewards page for full details.


SUPER JOINING SPECIAL STARTS SOON!

When you join Stampin’ Up! – anytime! – you’ll pay $100 plus tax to get signed up! Then – Stampin’ UP will send you a coupon code for $125 – use that against…whatever you want to purchase! There’s no limit and whatever is over and above the $125 will count towards your sales…AND you’ll get your discount on that amount! BOOM!
BUT! When you join during this special offer (6 – 31 Oct) – you will ALSO get an EXTRA $50 in Stampin’ Rewards deposited immediately in your Stampin’ Up! account!! You can spend THOSE anytime within the first three months after you sign-up. Whoo-hoo!
AND – if this is your first-time as a demonstrator – you’re ALSO going to receive a surprise Welcome Box right from Stampin’ UP!


And – did you know?? Stampin’ UP! Demonstrators get all those things PLUS…all the special things offered to customers!


Join for the fun – the discount – the early access to new goodies and new catalogs….or Join to get a little business going…it’s ALL up to YOU!
Let me know if you have any questions about joining or being a Stampin’ Up! demonstrator! Drop me a note at stamps-n-lingers@comcast.net, I’d love to chat with you!

Head over to my Join My Team page here to see all the benefits of being a Demonstrator! I’d love to have you on my team and help you get all that discount, and all the early goodies, and…ALL THE THINGS! 🙂
You can also see additional information on my Stampin’ Up! site here!


Click here to purchase your Starter Kit and Get Started!
Get the Stampin’ Up! Products Used in this Project:
<









Card Cuts Used in This Project:
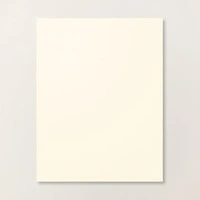
Very Vanilla Cardstock: 5 1/2″ x 8 1/2″ (card base, scored and folded at 4 1/4″); 7/8″ x 2 3/4″ (sentiment); Christmas Mice die cuts (mouse, candy cane, Christmas hat, gifts); 4″ x 5 1/4″ (inner liner)
Cherry Cobbler Cardstock: 3 3/8″ x 4 3/4″ (mat for DSP strips)
Timeless Metallic Specialty Paper: Christmas Mice die cut stars (x2); “dotted” rectangle and bow (for gifts)
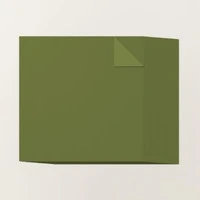
A Little Christmas DSP: 4 1/4″ x 5 1/2″ (card front panel); 3 1/4″ x 4 3/8″ (card front – cut into 7/8″ wide strips); 2 1/4″ x 6″ (envelope flap)
If you need any stamping supplies, I’d be very happy to be your Demonstrator. Just click on the Order Stampin’ Up! Online Now button on the right side of the screen to go directly to my online store or drop me an email if you have any questions. Happy Stamping!
Shop the Last Chance List here. Earn FREE Stampin’ Up! Products – Join my Punkin Head Peppermint Rewards – My online customer thank you program!
Finn Fan Fix 

One of the many awesome gifts my team gave me at my party a couple weeks back was a box of Pumpkin and Apple Dog Biscuit Mix and a cute bone-shaped cookie pan – both from King Arthur Flour (one of my favorite places to shop!).
So – yesterday – I made cookies! And – I even made the Peanut Butter version for them!

Addy was jonny-on-the-spot to lick the spoon!

We ended up with a nice pile of cookies!

Taste tests were called for!

I’m gonna have to be a MUCH faster picture taker to catch the bone BEFORE it’s snatched up by our velociraptor!

One more BIG thank you to all the people who know me – and my doggo’s! – so well!
🥰
TTFN
M