


Good morning everyone! Welcome to this month’s Fun Folds Blog Hop for Stampin’ Up! Demonstrators! We’ve got a talented line-up and…I think you’re going to like what you see! This is a once-a-month hop and…all our cards will be fun folds!! How cool is that?!?
For this month’s card, I went back to my fave tried-and-true-and-can’t-hardly-be-screwed-up fun fold – the classic book-fold card. To it, I added some gorgeous Lights of Aurora 6″ x 6″ DSP and the A Child is Born stamp set. Take a look-see:

To begin, I scored a 4 1/4″ x 11″ piece of Basic Black cardstock at 5 1/2” and 6 3/4” on the long side. Then I folded the 5 1/2” score line as a “mountain” – so….you know, ”regular”! – and at the 6 3/4” score in the opposite direction. Topographically speaking, that would be a “valley” fold!

Using Liquid Glue between the 5 1/2” and 6 3/4” score lines, I adhered the front of the card base to the back – just in that 1 1/4” area. This made the “book” or “side” fold.

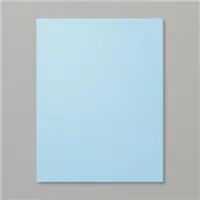
I took a 4″ x 5″ piece of Lights of Aurora 6″ x 6″ DSP and cut 1″ from the left end on the long side. I matted that 1″ x 4″ piece on a 1 1/8″ x 4 1/8″ piece of Balmy Blue cardstock and then adhered that to the book-fold side of the card front.
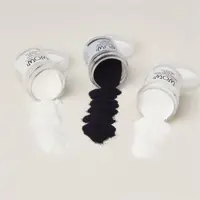
On the remaining piece of Lights of Aurora 6″ x 6″ DSP, I rubbed the panel with my Embossing Buddy and then stamped the Nativity from A Child is Born in Versamark Ink. I sprinkled it with Basics WOW Embossing Powder and heat set it with the Heat Tool.

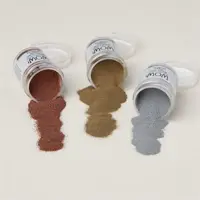
When cool, I rubbed the panel again with the Embossing Buddy and stamped the large star image from A Child is Born in Versamark Ink, sprinkled it with Silver Metallics WOW Embossing Powder and heat set that with the Heat Tool
Then I adhered the panel to a 4 1/8″ x 4 1/8″ piece of Balmy Blue cardstock and adhered it to the front of the card base with Liquid Glue. Note: see how I kept the “lights” pattern continuous across the two panels? 🙂

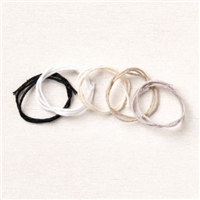
I tied a bow from a piece of black Baker’s Twine and adhered it with a Glue Dot.
On a piece of Balmy Blue cardstock, I stamped the A Child is Born sentiment in Tuxedo Black Memento Ink, then cut it out with a Stylish Shapes banner die.

I adhered the banner over the bow with Black Stampin’ Dimensionals.
Finally, I added some clear Faceted Snowflakes and the card front was done.

For the inside, I stamped another A Child is Born sentiment in Tuxedo Black Memento Ink on a 4″ x 4″ piece of Basic White cardstock. Then I stamped the large star image in Balmy Blue ink.

I used Liquid Glue to adhere the panel to a Balmy Blue mat and to the inside of the card base and the card was done. Easy peasy!
My Basic White Medium Envelope got the A Child is Born stars on the front…

…and more Lights of Aurora 6″ x 6″ DSP on the envelope flap.

Et Voila! This beautiful stamp set is so elegant – and versatile! I used A Child is Born a couple days back and it had a whole different feel! Put on Lights of Aurora 6″ x 6″ DSP gives it an otherworldly effect, don’t you think?! And – when you want a little sumpin’-sumpin’ extra for a card – lean into a Book Fold! Easy peasy – but…your recipients will love the “different-ness” of it! 🙂

I hope you like!
If you’d like to recreate this project, all the products and card cuts you’ll need are down below!
I’ve also created a printable PDF with written instructions and a list of the products used to create this project. You can download, print and/or save it by clicking this image:


Missed any tutorials? You can check out my past projects right here!
Now that you’ve seen my card, take a minute to hop thru all our projects today – you can just click on the names below to go direct to all the blogs!
Mary Deatherage – This is me! 😎
Have fun on the hop!
TTFN
M

Connect with me! https://campsite.bio/stampsnlingers
No Host Code Needed!
Earn 10% of your retail amount on all orders of $20 or greater! And you’ll be earning Punkin’ Head Peppermints – one peppermint for each $25 you spend thru my Online Store! When you gather up 16 Peppermint Points – you’ll be able to select a $40 gift right from me!
You’ll also be getting a link to my ZOOM The Craftroom (an exclusive TWICE-A-WEEK online event for my customers) and the monthly Online Tutorial – featuring the Delicate Pines Bundle for October orders.
See my Customer Rewards page for full details.


WANT TO JOIN US?
Well – this month may be the BEST time EVER to pull the trigger – and time is RUNNING OUT! Just 4 days LEFT!

Here’s the deets:
- Promotion Period: October 1–31
- New team members who purchase their starter kit from October 1 to 31 will be able to choose between these two offers:
- Option 1: Pick $125 worth of products for just $35 OR….
- Option 2: Pick $189 worth of products for just $99
- Whichever option you pick – you’ll get FREE shipping on the Kit, FREE business supplies, and a FREE Paper Pumpkin kit!

Now – I know there are LOTS of reasons to join Stampin’ UP! & lots of Demonstrators out there to join WITH!
But – obvs – I’d love to have you join with ME – and…here’s what I bring to the table!
- You’ll be a part of my Critters-N-Creatin’ Krew team!
- Free access to my online class tutorials
- Access to my ZOOM The Craftroom virtual stamping get-togethers each week!
- Monthly team meetings via video conference where we talk about the latest happenings at Stampin’ Up! and share project ideas. We’re scattered all over the United States, but we get together in person online and have lots of fun chatting!
- Whether you’d like to start a business or simply get that great discount, I’m here to support you in any way I can!
- When you join the Critters (that’s what we call ourselves!), you’re going to find tons of fun and inspiration from our team – our CNCK FB group is always sharing amazing, inspirational projects, and you’re going to get lots of ideas!
- Team giveaways and prizes! We do fun giveaways and prizes for sharing projects and for reaching sales and recruiting goals.
- Monthly team trainings and meetings for those interested in learning more about the business side of Stampin’ Up!.
- There’s no obligation to sell or share the products or hold workshops or blog or anything! Just enjoy that discount, baby!
- We also have fun challenges – just post pictures of what you’re working on – and you’re entered to win free SU product from me!
- And – not gonna lie. We’re really pretty cool!


So – be giving it a thought or three and…Click here or SCAN the QR code for Info!

Ready to pull the trigger? Here’s the link to do just that!
If you have any questions about joining, please drop me a note at here! I’d love to chat with you!
Get the Stampin’ Up! Products Used in this Project:












Card Cuts Used in This Project:
Basic Black Cardstock: 4 1/4″ x 11″ (card base, scored and folded at 5 1/2″ and 6 3/4″)
Balmy Blue Cardstock: 1 1/8″ x 4 1/8″ (mat for book-fold panel); 4 1/8″ x 4 1/8″ (x2 – mats for card front and for inner liner); Stylish Shapes banner die (sentiment)
Basic White Cardstock: 4″ x 4″ (inner liner)
Lights 0f Aurora 6″ x 6″ DSP: 1″ x 4″ (book-fold panel); 4″ x 4″ (card front); 2 1/4″ x 6″ (envelope flap)
If you need any stamping supplies, I’d be very happy to be your Demonstrator. Just click on the Order Stampin’ Up! Online Now button on the right side of the screen to go directly to my online store or drop me an email if you have any questions. Happy Stamping!
Shop the Clearance Rack here. Earn FREE Stampin’ Up! Products – Join my Punkin Head Peppermint Rewards – My online customer thank you program!
Finn Fan Fix 

No FFF’s on Blog Hop Days.
TTFN
M