Well – see? It did it again. Just a heartbeat ago I was telling Sonya and her granddaughter…see you next week.
BLINK!
And here it’s Friday again. What in the world?!? 🤦♀️🤦♀️🤦♀️
But since it’s Friday that means that yesterday some of you joined me for my YouTube live – and if that was you – then I appreciate you spending part of your week with me! If not – but you’d like to see the replay – here ’tis!
I’d had a request for a video showing how the Flowering Tulips 2-step stamps go together so…that’s what I did with this super easy fun fold card! This fun fold is PERFECT for showing off our beautiful designer paper and I really let the Flowering Fields DSP loose on all the many panels available to decorate. Take a look-see:
I’m always needing birthday cards so – it was easy to play along with the Watercooler Wednesday challenge this week!
This card is basically a little-card-on-a-bigger card. 🙂
The larger base card is a 5 1/2″ x 10 1/8″ piece of Early Espresso, scored and folded at 4 1/8″ and 8 3/8″ on the long side.
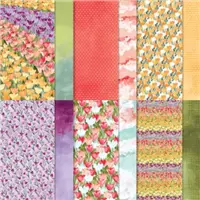
I used two designs of paper from the beautiful Flowering Fields DSP – one flower strewn (I’m calling it Design #1) and a softer design (call it Design #2) that happens to be the reverse side of the Design #1 paper!
I matted a piece of Design #1 on an Evening Evergreen mat and adhered it to the larger side of the card base with Liquid Glue. Then I did the same with a strip of Design #2 on the smaller panel (on the right side in the picture above).
On the inside, I matted a piece of Design #2 on Evening Evergreen for the inside of the large panel – and for the inside of the narrow strip.
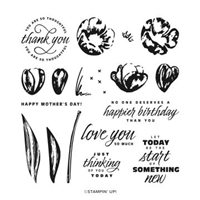
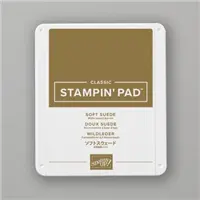
On a piece of Basic White, I stamped a sentiment from the Flowering Tulips stamp set in Soft Suede ink. In the corner, I stamped three tulips. Tip: there are three flowers in this set. Each flower is a two-step image – meaning you stamp one image and then stamp a second image over the top. When doing two step images like this – it’s VERY helpful to stamp your DARKEST color first – and then fill with the lighter color. It makes it MUCH easier to line everything up! 🙂
The stamps on the left are the first step (for me) and those on the right are the second – or “fill” – images.
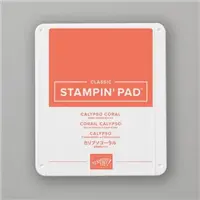
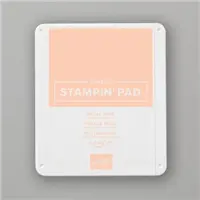
On my piece of Basic White, I stamped the largest Flowering Tulips flower (#1) in full strength Bumblebee ink using the first step stamp. Then I filled it in with the second stamp in stamped off once Bumblebee. Then I stamped the medium flower – with Calypso Coral for the first image and Petal Pink for the fill. The smallest flower is once again in full strength Bumblebee followed by stamped off once Bumblebee.
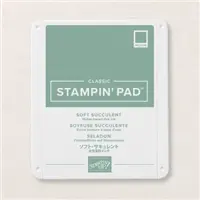
I added some stems and leaves in Soft Succulent – and a little flower center in Soft Suede on the largest flower.
Next up is the small card on the front.
It started with a 3 1/4″ x 7″ piece of Early Espresso, scored and folded in half at 3 1/2″.
For the front of the little card, I stamped the same three Flowering Tulips flowers as I did on the inside of the large card.
I stamped a Flowering Tulips sentiment in Soft Suede on Basic White and cut it out with the next-to-largest skinny Stitched Rectangle Die. I popped it onto the panel with Stampin’ Dimensionals.
I matted the panel on Evening Evergreen and then to the front of the small card base with Liquid Glue.
On a second piece of Basic White, I stamped a sentiment from my current go-to sentiment set – the wunnermus Special Moments set (FREE during Sale-A-Bration with a qualifying $100 purchase!) in Early Espresso. Then I added two of the small flowers (flower #3) in Bumblebee and stamped off once Bumblebee and a few Soft Succulent stems and leaves.
I used Liquid Glue to adhere the panel to an Evening Evergreen mat and into the inside of the small card. NOTE: be sure you keep checking your orientation – this part of the card opens “backwards” so…it’s easy to get mixed up! 😉
I used Liquid Glue to adhere the small card to the outside of the larger card – on the narrow strip on the right.
Then I matted a small piece of the Flowering Fields DSP (pattern #1) on Evening Evergreen and adhered it to the visible portion of the back of the small card – as shown above.
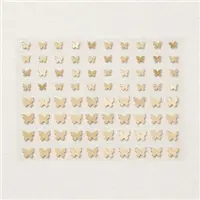
Because I love them so much, I pulled out my Brushed Brass Butterflies and…went to town! I put a few on every single Basic White panel on the card. Hint: that’s a LOT of butterflies, but…they’re so cute and THIN! and perfect! 🙂
And the butterflies finished off the card!
My Basic White Medium Envelope got another spray of Flowering Tulips on the front…
…and more of the Flowering Fields DSP on the envelope flap.
Et Voila! I was so happy to get the request to play with this Flowering Tulips set – I hadn’t really taken the time to look at the three images and figure them out – but now that I have – I LOVE them!! They’re just gorgeous. And I really love the leaves and little grasses and other elements that let us play “gardener”! The coordinating Flowering Fields DSP is. Absolutely. Stunning! And I think I’ve already extolled the virtues of the Special Moments set – the free piece is just the icing on the cake! 🙂
If you’d like to recreate this card, all the products and card cuts are listed below!
And…I’ve also created a printable PDF with written instructions and a list of the products used to create this project. You can download, print and/or save it by clicking this image:
Missed any tutorials? You can check out my past projects right here!
TTFN
Connect with me! https://campsite.bio/stampsnlingers
P.S. Don’t miss my Retired Products Sale! There’s a link right at the top of the page – come see what’s left! 🙂
HOST CODE FOR 16 JAN – 31 JAN: ABK32SQ6
Use this host code when you order $50 or greater and receive a free gift (AND the Monthly Card Tutorial) from me! If your order is over $150, please do not use this code, but you’ll still get the free gift. The free gift is your choice of any item valued up to $10.00 in any active Catalog! That includes some of the Host Exclusive stamp sets! See my Customer Rewards page for full details.
Note: Make sure that you can see my name on the final checkout page listed as your Demonstrator when you order so that you know that you’re ordering with me and you’ll get my rewards!
You’ll also be getting a link to my ZOOM The Craftroom (an exclusive TWICE-A-WEEK online event for my customers) and the monthly Online Tutorial. The January Tutorial features the Honeybee Home Bundle!
As is the case with ALL our Stampin’ Up! Sale-a-Brations, the January – February Sale-a-bration event has a SHOP, HOST and JOIN promotion! Check it out!
SHOP!
- There are 7 new products (4 stamp sets and 3 paper packs) that are available as free items to choose from with a Level 1 order (free with an order of $50+)
- There are 2 new items (1 stamp set and paper BUNDLE and and an amazing Sentiment set!) that are available as free choices with a Level 2 order (free with an order of $100+).
HOST!
- There’s also a great new host exclusive stamp set called Calming Camelia that you can pick up for FREE with either a personal order of $300+ or a party with sales totaling $300+!
- Drop me an email at stamps-n-lingers@comcast.net if you’re interested in setting up a personal host code for you and your friends to use – when you collect orders to reach the $300 retail point then you’ll get this cool sentiment-only stamp set for FREE! And that’s on TOP of the free Sale-A-Bration picks you’ll have!
JOIN – HERE’S THE BEST PART OF ALL!
- There is an AWESOME joining promotion happening! If you purchase the Starter Kit between January 4 and February 28, you’ll get to pick a TWO FREE stamp sets with your Starter Kit!! All stamp sets except for host exclusive and Sale-a-bration stamp sets are can be picked as your free sets!!
- When you purchase the Starter Kit for $99 + taxes (if applicable) before the end of Sale-a-bration, the kit ships for FREE and you get to pick $125 in Stampin’ Up! merchandise and you’ll get TWO additional FREE stamp sets with your kit! Yay!! Two free stamp sets in addition to $125 in merchandise for $99, yes please!!
If you have any questions about joining, please drop me a note at stamps-n-lingers@comcast.net, I’d love to chat with you!
You can also see additional information on my blog here: https://stampsnlingers.com/join-my-team/ and on my Stampin’ Up! site here: https://stampsnlingers.stampinup.net/join_now
Get the Stampin’ Up! Products Used in this Project:
Price: $11.50
Card Cuts Used in This Project:
Early Espresso Cardstock: 5 1/2″ x 10 1/8″ (large card base, scored and folded at 4 1/8″ and 8 3/8″); 3 1/4″ x 7″ (small card base, scored and folded at 3 1/2″)
Evening Evergreen Cardstock: 4″ x 5 3/8″ (x2 – mats for large card front and for DSP panel on inside); 4 1/8″ x 5 3/8″ (mat for large card inner liner – white panel); 3 1/8″ x 3 3/8″ (x2 – mats for small card front and inner liner); 1 5/8″ x 5 3/8″ (x2 – mats for narrow DSP panels); 1 7/8″ x 3 1/8″ (mat for back of small card)
Basic White Cardstock: 4″ x 5 1/4″ (large card inner liner); 3″ x 3 1/4″ (x2 – small card front and inner liner); Next-to-smallest skinny Stitched Rectangle Die cut (sentiment on front)
Flowering Tulips DSP: 3 7/8″ x 5 1/4″ – (pattern #1 for the large card front and pattern #2 for the inside DSP panel); 1 3/4″ x 3″ (pattern #1 for the back of small card); 1 1/2″ x 5 1/4″ – (pattern #2 – x2 – narrow DSP panels); 3″ x 6″ – (pattern #1 – envelope flap)
If you need any stamping supplies, I’d be very happy to be your Demonstrator. Just click on the Order Stampin’ Up! Online Now button on the right side of the screen to go directly to my online store or drop me an email if you have any questions. Happy Stamping!
Shop the Clearance Rack here. Earn FREE Stampin’ Up! Products – Join my Punkin Head Peppermint Rewards – My online customer thank you program!
Finn Fan Fix











 Inky Bee Stampers
 KarensCardCorner
 Stamp with Amy K
 Stamp With Nel
 Stampin With Shirley G
 Tarabeth Stamps
 TL's Bright Spot
Such a pretty card! Love those tulips, great colors too! Sorry that I missed your live, I’ll catch the replay. 🙂 Awww…Finn is always up for a photo shoot with mom. 🙂
Yes – he’s a bit of a ham! Thanks so much, Amy! 🙂
Great video using the tulips but I’m going to watch the replay again. I needed a cheat sheet for the daffodils so I’ll need the same for tulips. Love the DSP and the way your fun fold card displayed it. Finn Fan club selfies were adorable to see. He loves his mommy! Meeko has more pictures than my 4 grandchildren! She has her own chair in the stamping room to snooze while mommy creates. She loves when Judy (my one customer) comes over to have a class. She snoozes in her chair while we create! They are wonderful companions and she is my little Buddy in retirement. Daddy is still working. For me as a retired high school English teacher stamping is a joy!
I am so glad that you have Meeko to keep you company while you craft – it’s so cozy having them there with you, isn’t it?! Thanks so much, Kathryn – happy that you’re enjoying retirement! 🙂
Hi Mary!
Love this card! You have outdone yourself! Thanks for all of the details on how to make it myself. I am grateful for the directions, and looking forward to making one for a special friend.
Also – love the photos of you and your “man”. My favorite is the one where you are both smiling!
Enjoy your weekend!
— Angie
Thank you, Angie – and you, too! 🙂
Love how you used that DSP and, of course, I adore the photo shoot!
Thank you so much, Karen! I appreciate that! 🙂
Hey Mary…..another wonderful card! Again….thank you so much for the PDF……much appreciated.
The selfies are so cute……but how in the world can your face be so close to Finn’s face without getting slobbery kisses??!! Buffy would be kissing….kissing……kissing……I think Finn holds his licker much better than she does.
Oh – I was getting plenty of kisses. I click between swipes! ROFL!! Thanks so much, my friend! 🙂
I love a fancy fold card and this ones is very unique. Love all the different elements and your colour scheme. Thanks for joining us at WWC. Tristan DT.
Thanks so much, Tristan! Appreciate you coming by! 🙂
A really beautiful card! Love, love, love these tulips, and your video made me feel much more comfortable using them. I will definitely try this card. Right now I am working on cards that involve the windmills and tulip DSP. But your card is a perfect use of some of the DSP that I did not have plans for. Thanks for all the tips!
You bet – it is gorgeous paper, for sure! Have fun with all the pretty things! Thank you so much! 🙂
What a gorgeous card. Such a fun fold. Thanks for sharing with us at Watercooler Wednesday Challenge.
Thank you, Dawn – appreciate you stopping by! 🙂