
Here we go, folks – the very last Happy Stampers Blog Hop of the year. When next we meet, it’ll be 2016! I hope that you’ll take a moment on this – the last day of the year – to check out the card I have to share, and then hop thru all the other ladies’ posts to peruse their projects as well!
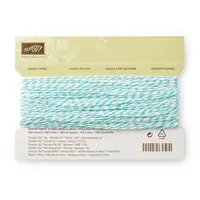
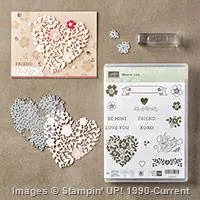
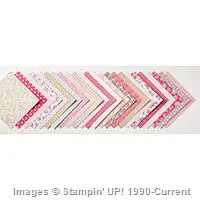
I used several designs from the Love Blossoms DSP Stack (coming on 5 Jan) to make a sort of sampler. Then I pulled the huge and gorgeous heart die and a few stamps from my Bloomin’ Love Bundle to finish it off. Take a look-see:

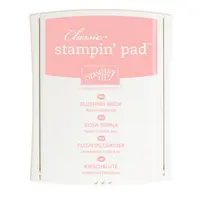
This week was a color challenge – and it was indeed a bit of a challenge for me!

Shouldn’t have been hard, right? Well – it is if you’re a goofus and you substitute Rose Red in your head for the Blushing Bride! I spent the whole time fighting my card – cause those colors just don’t work for me. Which is probably why they were not the challenge! Here’s how the card looks with Rose Red….

I realized my error as I was photographing the card. So I had to re-group and fix it! Fortunately, it was really only a matter of re-doing the Bloomin’ Heart Thinlit die cut heart and its embellishments.
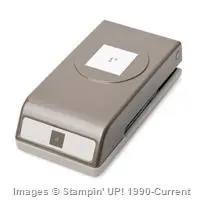
I started by making the patchwork sampler-esque background for the card front. Using several of the designs from the Love Blossoms DSP Stack, I cut out 12 squares using my 1″ Square Punch. I matted each square on a Real Red card stock mat (cut with my Stampin’ Trimmer), securing them with Multi-Purpose Liquid Glue. To further enhance the idea of a patchwork quilt, I used my Soft Suede Stampin’ Write Marker to draw stitches around each mat, and adhered each piece to my Soft Suede mat with more Liquid Glue. I laid my craft ruler across the top of the card stock panel to give myself a little bit of help in getting them lined up.

For the heart, I cut the Bloomin’ Heart die cut from a piece of Botanical Gardens Designer Vellum (coming 5 Jan). I also cut a second (solid) heart from the same vellum – I laid the die on the vellum and lightly traced the heart with a pencil, then cut it with my Paper Snips. Then I used my Fine-Tip Glue Pen to adhere it to the card front.
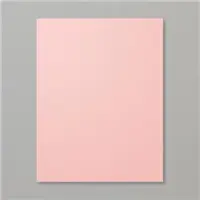
Decorating the die cut heart was easy – I just used the small and the larger flower images from Bloomin’ Love (also coming 5 Jan) and stamped the flowers in Blushing Bride. To give it a little more color – I turned the heart over and colored each of the hearts in with my Blushing Bride Stampin’ Write Marker.
For the dimensional flowers, I used the two small flower dies from the Bloomin’ Heart Thinlits and cut several of each in both Blushing Bride card stock and more of the Botanical Gardens Designer Vellum. I rolled all the petals and then used my Fine-Tip Glue Pen to create flowers – some with vellum bottoms and some with card stock bottoms. Then I used that same Fine-Tip pen to adhere them to the die cut heart.

Once I had them on the heart, I used Stampin’ Dimensionals (behind the flowers and tiny pieces behind the stamped flowers) to adhere the die cut heart to the solid heart. The solid heart softened the colors of the patchwork behind the die cut heart, letting that heart stand out a little better.
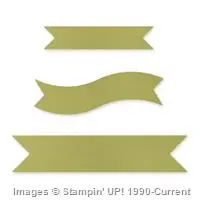
I made the sentiment banner by embossing the sentiment from Bloomin’ Love onto a piece of Botanical Gardens Vellum. I made it Soft Suede-colored by inking my stamp with Versamark and then with Soft Suede and then stamping the vellum. I sprinkled it with Clear Stampin’ Emboss Powder and heated it up! I decided I wanted it a little darker – so I turned the paper over and traced the back of the sentiment with my Soft Suede Stampin’ Write Maker. I cut it out with a Bitty Banner Framelit and also made a matching banner from Blushing Bride card stock. Then I adhered the two banners to the card front with my Fine-Tip Glue Pen, and stuck the final flower over the top.
Some Pearl Basic Jewels were next. And, since I’m a little obsessed with the Wink of Stella, I used my Clear pen to color in each of the vellum flowers, and also shimmered up the sentiment banner! And that was it for the card front.
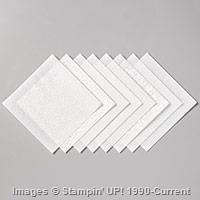
On the inside, I used a piece of Shimmery White card stock and SNAILd it to a panel of Soft Suede. Then I inked up the sentiment from Bloomin’ Love – I used my Soft Suede Ink Pad to carefully ink the sentiment and then I used my Rose Red Marker to color the heart. Yes – I didn’t change the inside liner when I realized the error of my ways. Mea Culpa!

For the little flower in the corner, I used that Rose Red Stampin’ Write Marker, plus my Soft Suede and Pear Pizzazz markers to ink the stamp and create the image. Then I SNAILd it into my Real Red card base, added the card front with Stampin’ Dimensionals and the card was done!
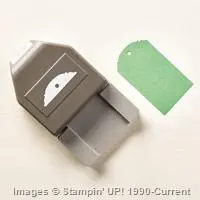
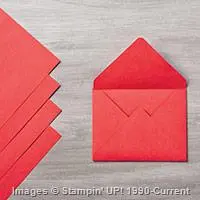
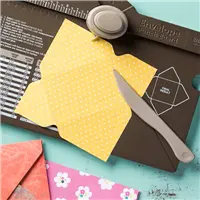
I made a custom envelope with Real Red Envelope Paper and my Envelope Punch Board. If you’d like a refresher on how to use the Envelope Punch Board to make custom envelopes and liners, check out my Tutorial here! Once the envelope was made, I used Real Red Ink to stamp several Bloomin’ Love flower bunches onto the front of the envelope…

…then I made a liner for the envelope using some more of the Love Blossoms DSP Stack paper.

Et Voila! Definitely took a bit of a circuitous route to get here, but get here I did! I hope that you like the final result!
Now that you’ve seen my card, please take a little time to visit all the Happy Stampers Team blogs today.
If you click on the Next Blog button, you’ll go right to Jari Francis’ page. And you can just click on the names below to go direct to all the blogs!

Mary Deatherage – YOU ARE HERE!
Enjoy the Hop!
TTFN
Mary
WEEKLY DEALS FOR 29 Dec – 4 Jan 15!! Click here to see the Weekly Deals from Stampin’ Up! in my online store. The Weekly Deals are only while supplies last and only available at these great prices through 4 Jan!

Built for Free Using: My Stampin Blog
IT’S TIME FOR THE STAMPIN’ UP! YEAR-END CLEARANCE!

- Promotion Dates: December 10, 2015-January 4, 2016.
- No minimum purchase required.
- No refunds or exchanges on Year-End Sale items.
- Items offered during the Year-End Sale are while supplies last.
- You can add non-Year-End-Sale items to any online order!
- Year-End Sale orders are eligible for Stampin’ Rewards with qualifying orders.
- Following the Year-End Sale, some remaining items may stay in the Clearance Rack. Other items may be removed from the Clearance Rack to be added at another undetermined time.
- Place your orders online thru my online store!
- Deadline for ordering isJ anuary 4, 2016; 11:50 PM (MT)

- Dates: 16 Nov 15 – 4 Jan 16 (or while supplies last)
- Holiday Catalog Retiring List: The list is available here. It’s going to be updated every business day, so I’ll be checking and updating this link with every post.
- Remaining inventory for retiring products may appear later on the Clearance Rack. Here’s a link to the Clearance Rack – be sure to check often to see if your favorite hits the rack!
- Due to high demand for retiring stamps, Stampin’ Up! plans to keep producing retiring stamps until December 28. This is only applicable to stamps. Accessories are only available until they run out!
STAMPIN’ UP PRODUCTS USED IN TODAY’S PROJECT:


Built for Free Using: My Stampin Blog
Card Cuts Used in Today’s Project
Real Red Card Stock: 4 1/4″ x 11″ (card base; scored and folded at 5 1/2″); 1 1/4″ squares (x12 for the patchwork mats)
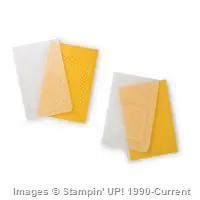
Soft Suede Card Stock: 4 1/8″ x 5 3/8″ (card front mat and inner liner mat)
Shimmery White Card Stock: 4″ x 5 1/4″ (inner liner)
Love Blossoms DSP Stack paper: 1″ squares (x12 for the patchwork); 4 1/2″ x 4 1/2″ (envelope liner)
Botanical Gardens Designer Vellum: Bloomin’ Heart Die cut; flower die cuts
Blushing Bride Card Stock: flower die cuts
Real Red Envelope Paper: 8 1/8″ x 8 1/8″ (envelope)
If you need any stamping supplies, I’d be very happy to be your Demonstrator. Just click on the Order Stampin’ Up! Online Now button on the right side of the screen to go directly to my online store or drop me an email if you have any questions. Happy Stamping!
Shop the Clearance Rack here. Earn FREE Stampin’ Up! Products – Join my Punkin Head Peppermint Rewards – My online customer thank you program!
BACKORDER LIST AS OF 29 DEC 15
4 January
140603: Big Shot Die Brush (3 backordered; 10,896 expected)
8 January
126995: Stampin’ Trimmer Cutting Blades (1,392 backordered; 6,688 expected) – due to quality issues with the manufacture of the blades, we likely won’t see these back in stock until the end of February!
RETIRED LIST (These products are officially retired and will no longer be available once our current inventory is depleted.)
2015 Holiday Retiring List
140969: Witching Décor Project Kit (sold out)
139673: Woodland Textured Impressions Embossing Folder (sold out; Will be returning in the 2016 Annual Catalog – Whoo-hoo!)
139670: Sleigh Ride Edgelits Dies (sold out)
140861: Jingle All the Way Bundle (wood-mount; sold out)
140862: Jingle All the Way Bundle (clear-mount; sold out)


 Inky Bee Stampers
 KarensCardCorner
 Stamp with Amy K
 Stamp With Nel
 Stampin With Shirley G
 Tarabeth Stamps
 TL's Bright Spot
Wow, that’s a totally amazing card Mary. Wishing you a very Happy New Years.
Thanks, Sandi – and Happy New Years to you, too! 🙂
Very cool Mary! Love the patchwork quilt technique and the red layering behind it is perfect. It looks good in Rose Red too! 😉
Ha – I did get to where I didn’t hate the Rose Red combo, but…. thanks, Amy! 🙂
Cool patchwork design, Mary! I love how it turned out! The vellum heart looks awesome over the rest of the design, too! Happy New Year!
Thanks a lot, Jari – and Happy New Years to you as well! 🙂
Another winner! I, too, love the quilt effect, and you have become the flower crafter par excellence.
I don’t know about all that, but…thanks, Mom! 🙂
beautiful design but that vellum heart is the WOW factor in your card, GREAT JOB creating.
Thanks, Kristi – it’s an awfully pretty die!! 🙂
You put alot of work into these cards…..love the “stitches” around each of the squares. Very country feel. Well done. Happy New Years to you ! Enjoy.
Thanks so much, Shelagh – Happy New Years to you as well! 🙂
Hello Sandi, Thank you so much for sharing with us. I really like your cad. I must be having a few senior moments today. As I read the directions for heart it just wasn’t computing in my brain/ I understood everything eels, but could not fathom what you were saying about your heart. And your card turned out so pretty, I really wanted to this for my granddaughters. I have 17 of them. Soif you figure out some way to compute to my senior brain, I would be so thankful!
Thanks for the kind words! Can you tell me which part about the heart didn’t compute? I’ll try to make it more clear! 🙂
I am new to your blog and enjoying your cards. Keep them coming.
Welcome, Marlene! I really appreciate you following me an leaving such nice comments! Thanks very much. And I for sure will keep them coming! 😊